Crochet Mini Pumpkins in Every Color
This post may contain affiliate links. If you buy through them we may earn a small commission at no extra cost to you. Learn more.
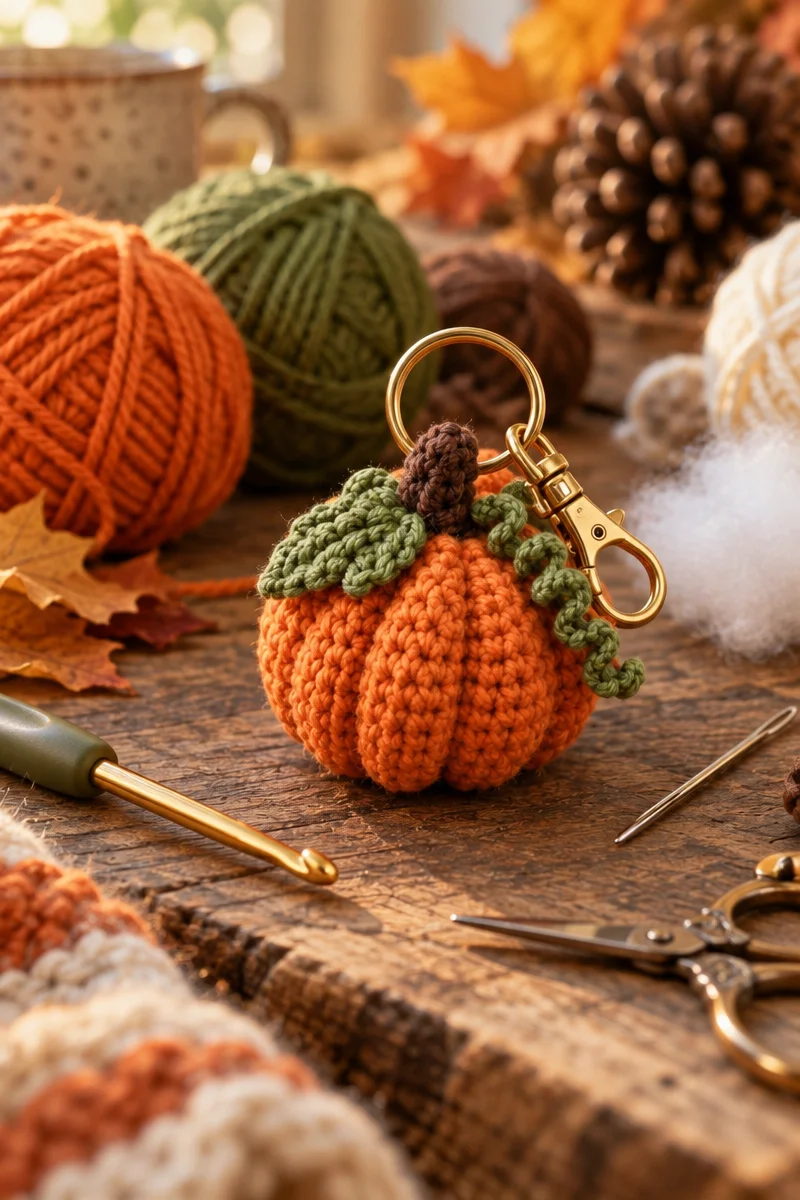
Mini pumpkins are one of those crochet projects that are hard to stop making. With a magic ring, simple single crochet stitches, and a few increases, you can create a colorful collection of soft pumpkin charms for autumn decorating, gifts, keychains, or bags. This project is suitable for beginners who are ready to practice crocheting in the round, and each pumpkin can be customized with a different fall-inspired color.
Thank you for reading this post, don't forget to subscribe!Why you’ll love this pattern
These crochet mini pumpkins are quick, portable, and useful for small amounts of leftover yarn. The basic shape relies on familiar single crochet stitches and gradual increases, making it a practical way to build confidence with amigurumi-style construction.
They also make thoughtful handmade gifts. Create a set in orange, cream, green, rust, mustard, or brown, then use the finished pumpkins as seasonal ornaments, bag charms, or small decorations. Because the pumpkins are made individually, you can experiment with color without committing to a large project.
“I made three pumpkins during one weekend and loved how different they looked in each color. The steps were simple, and adding the little stems made them look finished and gift-ready.”
How this crochet pattern comes together
You will crochet a small pumpkin in continuous rounds, beginning with a magic ring containing six single crochet stitches. The number of stitches grows through increases so the piece develops a rounded pumpkin shape.
After crocheting the main body, you will lightly stuff it, close or finish the top, and add a loop if you want to attach the pumpkin to a keychain or bag. A small brown stem is optional.
The pattern uses basic single crochet, increasing, working in the round, changing colors, stuffing, and simple finishing. It is beginner-friendly, especially for crocheters who already know how to make a magic ring. The exact completion time depends on the yarn, hook, and size you choose, but these small projects are designed to be relatively quick.
Materials you’ll need
- Yarn in orange, cream, green, and other fall colors
- Crochet hook
- Stuffing or fiberfill
- Scissors
- Yarn needle
- Optional: brown yarn for the stem
- Optional: keychain hardware or a small split ring for attaching the finished pumpkin
A smooth yarn is easiest to work with because you can clearly see the stitches and count increases. Acrylic or cotton yarn can both work well, but the final texture and firmness will vary. Cotton often gives a neat, structured finish, while acrylic may feel softer.
The source pattern does not specify a yarn weight or hook size, so choose a hook recommended on your yarn label. A slightly smaller hook can create tighter stitches and help prevent stuffing from showing. If you use a different yarn weight, the pumpkin’s size and yarn requirements will change.
Step-by-step instructions
-
Make a magic ring. Form a magic ring and crochet 6 single crochets into the ring.
-
Tighten the center. Pull the yarn tail to close the magic ring securely. Check that there is no large hole in the center.
-
Work in the round. Continue crocheting around the pumpkin using single crochet stitches. Increase stitches as needed to build the rounded pumpkin shape.
-
Change colors if desired. Switch between orange, cream, green, or other fall colors to create different pumpkins. Change colors neatly at the end of a round or wherever the design calls for it.
-
Add the stuffing. Once the pumpkin has formed its rounded body, stuff it lightly with fiberfill. Add small amounts at a time so you can control the shape. Avoid packing it too firmly, since overstuffing can stretch the stitches and make the pumpkin look lumpy.
-
Finish the top. Complete the top of the pumpkin and leave or create a small loop for attaching it to a keychain or bag.
-
Add an optional stem. Use brown yarn to make a small stem and attach it securely to the top of the pumpkin with a yarn needle.
-
Secure the ends. Weave in loose yarn tails carefully on the inside or underside of the pumpkin. Trim excess yarn only after the ends are secure.
The source instructions provide the starting stitch count and general shaping method but do not specify an exact increase sequence, final stitch count, or closing method. Follow the intended pumpkin shape as you work, and avoid adding unplanned increases once the body reaches the desired roundness.
Finished project inspiration
- Attach a finished pumpkin to a keychain, zipper pull, tote bag, or backpack.
- Group several pumpkins in different colors in a bowl for seasonal décor.
- Use them as small autumn ornaments or table decorations.
- Make coordinating pumpkins as handmade gifts for friends, teachers, or coworkers.
- Create a fall-themed garland by adding loops and connecting several pumpkins.
- Offer sets of mini pumpkins at craft fairs or in a handmade shop, provided the original pattern’s usage terms allow it.
- Pair cream, orange, and green pumpkins for a harvest display, or use muted rust and mustard shades for a neutral autumn palette.
How to care for your crochet project
Care depends on the yarn fiber used. Always check the yarn label before washing.
For most handmade mini pumpkins:
- Spot-clean gently with a damp cloth when possible.
- If the yarn label permits washing, use cool or lukewarm water and mild detergent.
- Avoid vigorous scrubbing, twisting, or wringing.
- Press out excess water with a towel.
- Reshape the pumpkin gently and allow it to air-dry completely.
- Keep it away from high heat, which can distort synthetic fibers or shrink natural fibers.
- Store it in a dry place away from direct sunlight to help prevent fading.
- Do not store it while damp, as the stuffing may retain moisture and develop an unpleasant odor.
Because the pumpkin is stuffed, flat drying is not always necessary or practical. Instead, shape it carefully and place it somewhere with good airflow while it dries.
Tips for success
- Use a stitch marker to identify the beginning of each round, especially if you are crocheting continuously.
- Count your stitches after each increase round. Accidental increases can make the pumpkin uneven or overly wide.
- Keep your tension firm but not tight. Very loose stitches may expose the stuffing, while overly tight stitches can make increases difficult.
- Use a smaller hook if you notice visible gaps between stitches.
- Add stuffing gradually and rotate the pumpkin as you work so the filling is distributed evenly.
- Do not overstuff the body. A lightly filled pumpkin usually has a softer, more natural shape.
- When changing colors, carry yarn only if the hidden strand will not show through the stitches. Otherwise, cut the old color and weave in the ends later.
- Secure the top loop and stem firmly if the pumpkin will be used as a keychain or bag charm.
- Check the attachment point before giving the item to a child. Small parts and keychain hardware may not be suitable for young children.
Customize your project
- Try new color combinations: Use traditional orange, harvest green, cream, rust, mustard, brown, or dusty pink.
- Make a coordinated set: Crochet several pumpkins in different colors and display them together.
- Use one color with a contrasting stem: A cream pumpkin with a brown stem or a green pumpkin with a dark stem creates a simple, polished look.
- Change the yarn weight: Thicker yarn will produce a larger pumpkin, while thinner yarn will make a smaller one. You may need to adjust the hook size and stuffing amount.
- Add embroidery: Stitch tiny lines down the pumpkin to emphasize its sections, or add a simple face for a playful decoration.
- Experiment with texture: A textured yarn can create an unusual finish, but it may make individual stitches harder to see and count.
- Vary the loop: Make a short loop for a keychain or a longer loop for hanging as an ornament.
- Create seasonal palettes: Use cream and sage for a neutral display, or combine orange, black, and purple for Halloween décor.
Changing yarn weight or hook size will affect the finished dimensions, firmness, and amount of yarn needed. Always make a small test section if consistent sizing matters.
Frequently asked questions
Is this crochet pumpkin pattern beginner-friendly?
Yes. The project uses a magic ring, single crochet, increases, working in the round, stuffing, and basic finishing. Beginners may need a little practice with the magic ring and keeping track of rounds.
What yarn works best for mini pumpkins?
Smooth acrylic or cotton yarn is a practical choice. Cotton tends to create a firm, defined shape, while acrylic gives a softer finish. Use a yarn that allows you to see the stitches clearly.
What hook size should I use?
The source pattern does not provide a specific hook size. Use the hook recommended for your chosen yarn, or select a slightly smaller hook if you need tighter stitches to keep the stuffing from showing.
Can I use a different yarn weight?
Yes, but the finished pumpkin will change size and texture. Thicker yarn generally creates a larger pumpkin, while thinner yarn makes a smaller one. Hook size, stuffing quantity, and yarn requirements may also change.
How do I stop the stuffing from showing?
Use firm, even tension and avoid loose stitches. If gaps remain, try a smaller hook. Stuff the pumpkin lightly rather than forcing in too much filling, which can stretch the stitches.
How can I make the pumpkin larger or smaller?
Changing yarn weight and hook size is the simplest approach. You can also work more or fewer rounds, but the source instructions do not provide a detailed increase or decrease sequence, so shaping will require careful observation.
Why does my pumpkin look lumpy?
Lumps usually come from uneven stuffing, inconsistent tension, or adding increases in the wrong places. Redistribute the filling before closing the top, and use a stitch marker to help track the round.
Can I attach the pumpkin to a keychain?
Yes. Finish the top with a secure loop and attach keychain hardware or a small split ring. Reinforce the loop and weave in the ends thoroughly because bag and keychain attachments receive regular pulling.
How should I wash the finished pumpkin?
Follow the yarn-label instructions. When the fiber is unknown, spot-clean first or hand wash gently in cool water. Avoid wringing, reshape the pumpkin, and let it air-dry completely.
How much yarn will I need?
The source pattern does not state a yardage amount. Mini pumpkins use relatively small quantities, but the amount depends on the yarn weight, hook size, number of pumpkins, and color changes.
Can I sell pumpkins made from this pattern?
The provided pattern information does not state its licensing or selling terms. Check the original designer’s usage policy before selling finished items, and credit the designer when required.