Crochet Bunny Amigurumi Free Pattern
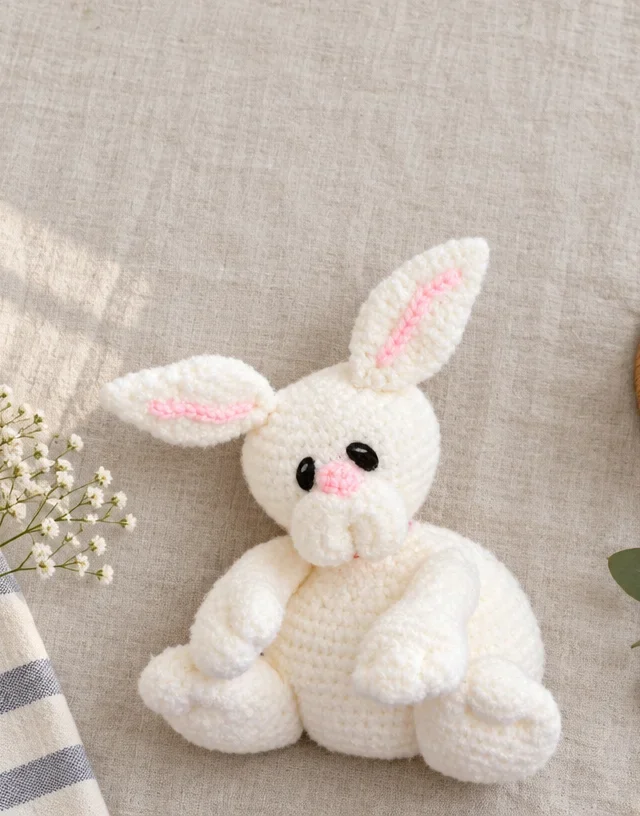
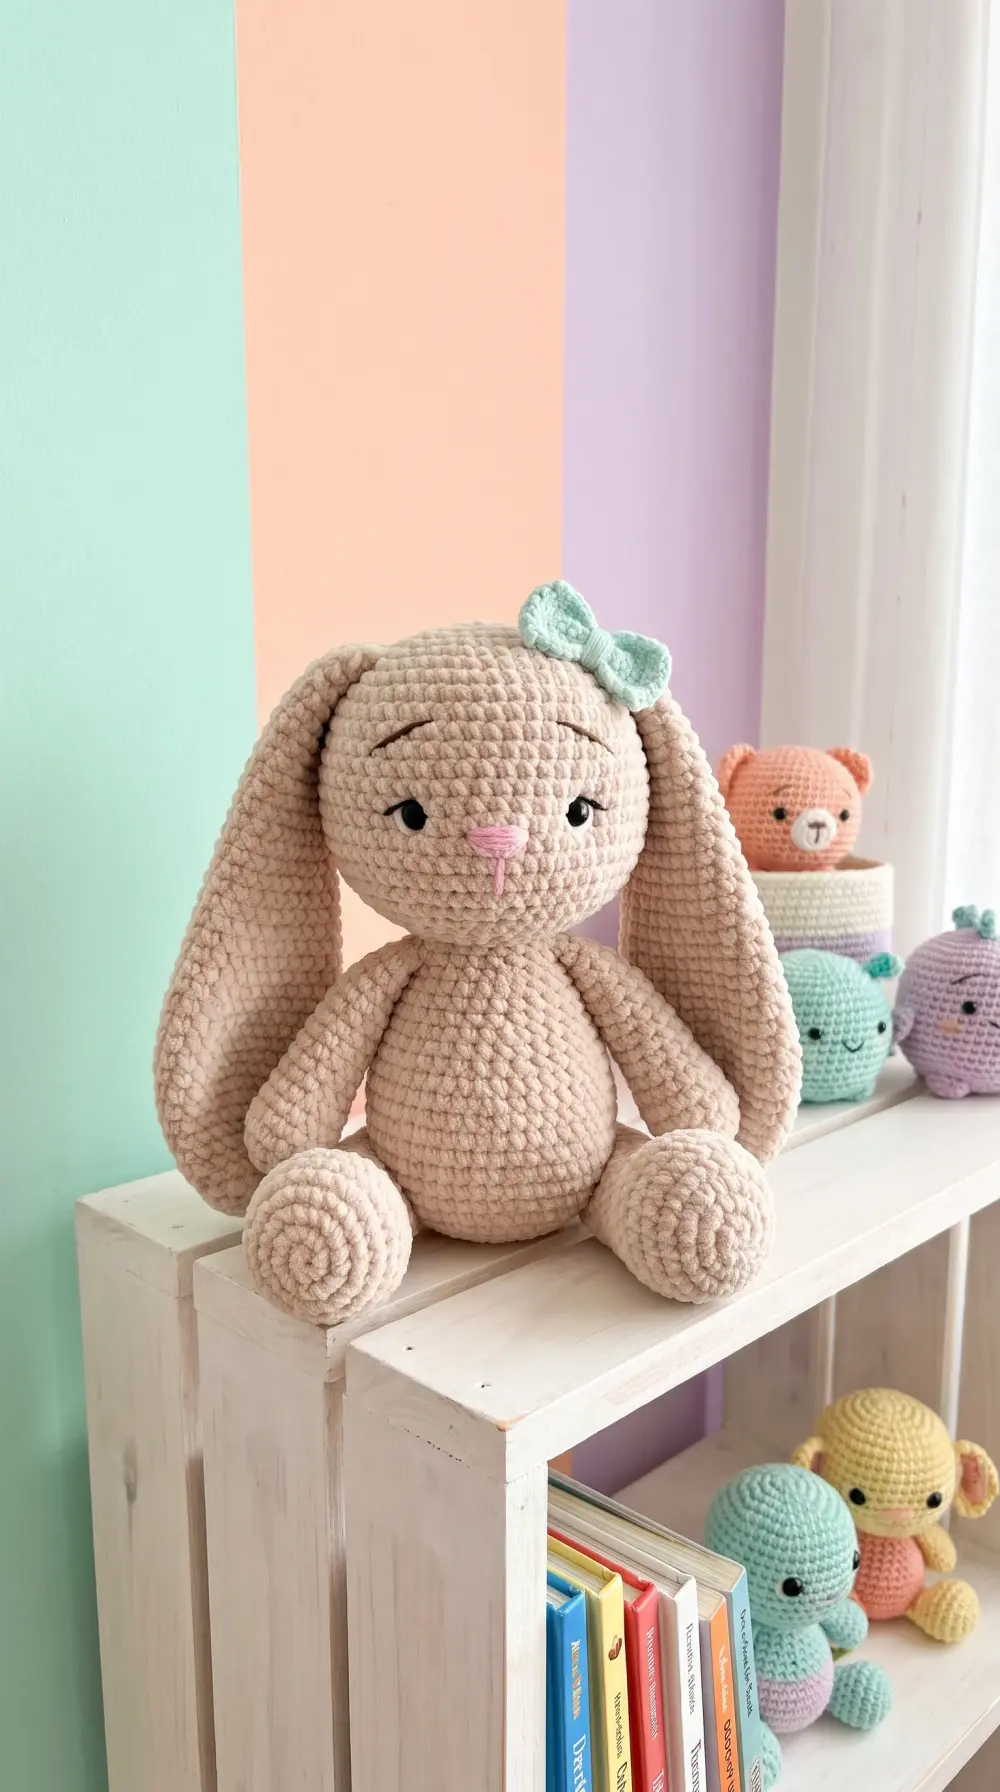
A sweet, beginner-friendly amigurumi bunny with long floppy ears — worked in simple single crochet rounds. Full step-by-step pattern with stitch counts.
- Skill level
- Easy
- Time
- 3–4 hours
- Yarn
- DK or worsted weight (#3–4)
- Hook
- 3.5 mm (E-4)
- Finished size
- About 7 in (18 cm) tall with ears
This post may contain affiliate links. If you buy through them we may earn a small commission at no extra cost to you. Learn more.
This little bunny is one of the first amigurumi we recommend to beginners. Every piece is worked in the round with single crochet, increases and decreases — the three skills you need for nearly every amigurumi pattern out there. Make one for Easter baskets, a baby shower, or simply because a shelf looks emptier without one.
Thank you for reading this post, don't forget to subscribe!Materials
- DK or worsted weight (#3–4) cotton or acrylic yarn in beige, about 90 yards
- Small amount of pink yarn for the nose (optional)
- 3.5 mm (E-4) crochet hook
- 8 mm safety eyes (or black yarn for embroidered eyes)
- Polyester fiberfill
- Stitch marker, tapestry needle, scissors
Abbreviations (US terms)
| Abbreviation | Meaning |
|---|---|
| MR | magic ring |
| sc | single crochet |
| inc | 2 sc in the same stitch |
| dec | single crochet two together (invisible decrease recommended) |
| ( ) x6 | repeat what’s in the brackets 6 times |
| [ ] | stitch count at the end of the round |
Pattern notes
- All pieces are worked in a continuous spiral. Don’t join rounds — place a stitch marker in the first stitch of each round and move it up as you go.
- Use the invisible decrease (insert hook in the front loop of the next 2 stitches, yarn over, pull through both front loops, yarn over, pull through 2) for the neatest finish.
The pattern
Head
- Rnd 1: 6 sc in MR. [6]
- Rnd 2: Inc in each st around. [12]
- Rnd 3: (Sc, inc) x6. [18]
- Rnd 4: (2 sc, inc) x6. [24]
- Rnd 5: (3 sc, inc) x6. [30]
- Rnd 6: (4 sc, inc) x6. [36]
- Rnds 7–13: Sc in each st around. [36]
- Place the safety eyes between Rnds 10 and 11, about 7 stitches apart.
- Rnd 14: (4 sc, dec) x6. [30]
- Rnd 15: (3 sc, dec) x6. [24]
- Rnd 16: (2 sc, dec) x6. [18] — Stuff the head firmly.
- Rnd 17: (Sc, dec) x6. [12]
- Rnd 18: Dec x6. [6]
- Fasten off, weave the tail through the front loops of the last 6 stitches and pull closed.
Body
- Rnd 1: 6 sc in MR. [6]
- Rnd 2: Inc in each st around. [12]
- Rnd 3: (Sc, inc) x6. [18]
- Rnd 4: (2 sc, inc) x6. [24]
- Rnd 5: (3 sc, inc) x6. [30]
- Rnds 6–10: Sc in each st around. [30]
- Rnd 11: (3 sc, dec) x6. [24]
- Rnds 12–13: Sc in each st around. [24]
- Rnd 14: (2 sc, dec) x6. [18]
- Rnds 15–16: Sc in each st around. [18]
- Fasten off, leaving a long tail for sewing. Stuff firmly.
Ears (make 2)
- Rnd 1: 6 sc in MR. [6]
- Rnd 2: (Sc, inc) x3. [9]
- Rnd 3: (2 sc, inc) x3. [12]
- Rnds 4–10: Sc in each st around. [12]
- Rnd 11: (2 sc, dec) x3. [9]
- Rnd 12: Sc in each st around. [9]
- Do not stuff. Flatten the ear and sc through both layers to close (4 sc). Fasten off, leaving a tail for sewing.
Arms (make 2)
- Rnd 1: 6 sc in MR. [6]
- Rnd 2: (Sc, inc) x3. [9]
- Rnds 3–8: Sc in each st around. [9]
- Stuff the bottom lightly, flatten the top and sc through both layers to close. Fasten off, leaving a tail.
Legs (make 2)
- Rnd 1: 6 sc in MR. [6]
- Rnd 2: Inc in each st around. [12]
- Rnds 3–5: Sc in each st around. [12]
- Rnd 6: (2 sc, dec) x3. [9]
- Rnds 7–8: Sc in each st around. [9]
- Stuff lightly. Flatten and sc through both layers to close. Fasten off, leaving a tail.
Tail
- Rnd 1: 6 sc in MR. [6]
- Rnd 2: Inc in each st around. [12]
- Rnds 3–4: Sc in each st around. [12]
- Rnd 5: Dec x6. [6]
- Stuff, close and leave a tail. (Or attach a small white pom-pom instead.)
Assembly
- Head to body: Sew the open edge of the body to the bottom of the head, stuffing the neck a little more before closing.
- Ears: Sew to the top of the head between Rnds 3 and 5, about 6 stitches apart. Let them flop forward or to the sides.
- Arms: Sew to the sides of the body, just below the neck.
- Legs: Sew to the bottom front of the body so the bunny sits up.
- Tail: Sew to the back, about 3 rounds from the bottom.
- Nose: With pink yarn, embroider a small V between the eyes, 1–2 rounds below them.
Make it your own
- Add a tiny crochet scarf or flower crown.
- Make the ears in a contrasting color, or line them with pink felt.
- Use chenille yarn for an extra-soft, plush bunny (go up to a 4 mm hook).
Frequently asked questions
Is this bunny safe for babies?
For babies and toddlers, skip the safety eyes and embroider the eyes with black yarn instead, and sew all parts on very securely.
Why use a smaller hook than the yarn label says?
Amigurumi is worked tightly so the stuffing doesn’t show through. Going down a hook size or two gives you a dense, neat fabric.
My rounds look like they’re spiraling to one side. Is that normal?
Yes — working in a continuous spiral naturally shifts the start of each round slightly. Keep using a stitch marker and it won’t affect the finished bunny.