Tiny Crochet Bunny Bag Charm
This post may contain affiliate links. If you buy through them we may earn a small commission at no extra cost to you. Learn more.
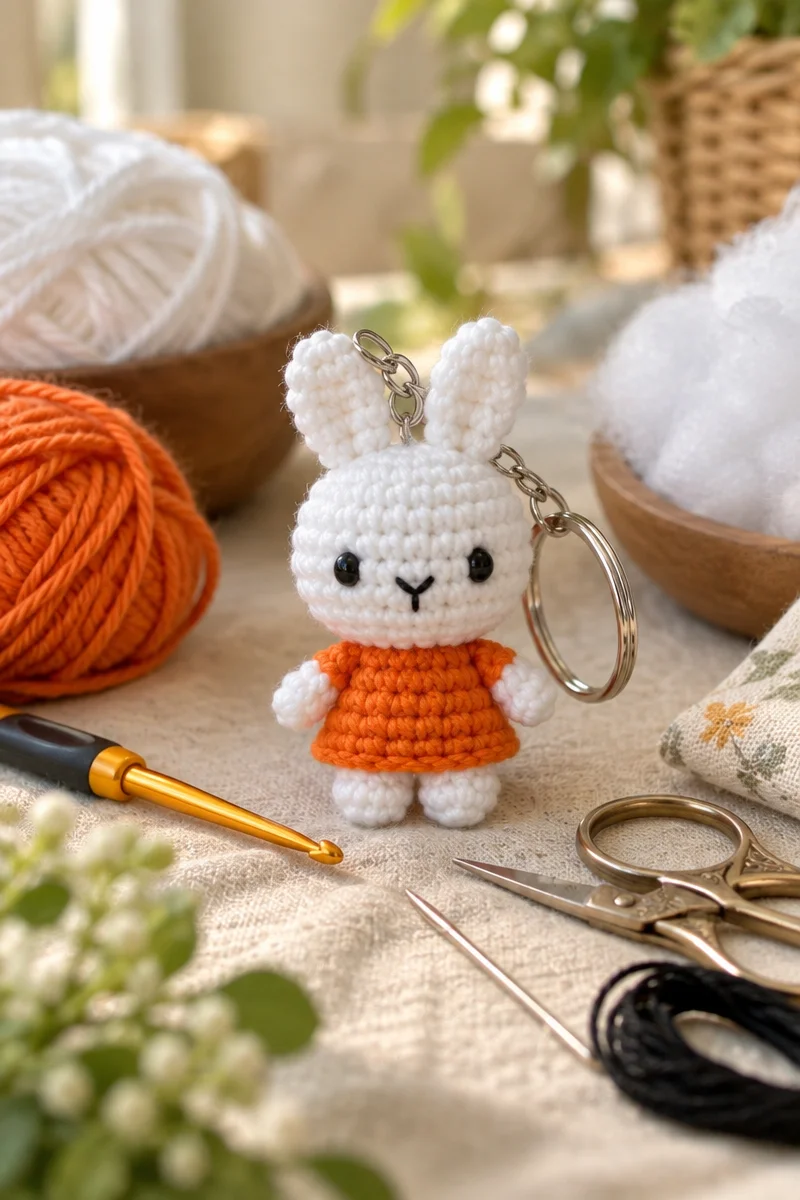
This tiny crochet bunny is a sweet, portable project that adds a handmade touch to any bag, backpack, or set of keys. With a white crocheted body, long ears, and a cheerful orange dress, it makes a thoughtful Easter gift, craft-fair item, or relaxing weekend project for crocheters who enjoy small amigurumi-style makes.
Thank you for reading this post, don't forget to subscribe!Why you’ll love this pattern
This crochet bunny keychain is small enough to work on anywhere, making it ideal for travel, waiting rooms, or a quiet evening at home. The construction also introduces several useful crochet skills without requiring a large amount of yarn or a complicated colorwork design.
You will practice:
- Crocheting small three-dimensional pieces
- Attaching separately made parts
- Stuffing a project evenly
- Creating simple embroidered facial features
- Adding a finished crochet piece to a keychain ring
- Using two colors for a small clothing detail
The finished bunny has plenty of handmade charm and can be made as a personal accessory or a small gift. It is especially suitable for beginners who are comfortable with basic crochet and want to try a simple stuffed figure.
“This bunny was such a cheerful little project. The pieces came together quickly, and the orange dress made it look especially cute on my tote bag.”
How this crochet pattern comes together
You will crochet the bunny body and head separately in white yarn, then attach the pieces to form the main figure. Long ears are made next and secured to the head. The orange dress adds the main contrasting detail before the bunny is finished with stuffing, embroidered facial features, and a keychain ring.
The pattern relies on basic shaping and assembly rather than complex stitch techniques. You will need to work with steady tension and be comfortable joining crocheted pieces, but the instructions are approachable for an advanced beginner. The total time depends on your speed, yarn thickness, and experience with small crochet projects.
Because this is a tiny stuffed accessory, careful stuffing and neat finishing are more important than working quickly. Add stuffing gradually so the bunny keeps a smooth shape without becoming stiff or lumpy.
Supplies list
Gather the following materials before beginning:
- White yarn: For the body, head, and ears
- Orange yarn: For the small dress
- Crochet hook: Choose a hook suitable for your yarn; a slightly smaller hook than usual can help create firm fabric for a stuffed item
- Stuffing: Polyester fiberfill or another soft toy-filling material
- Embroidery thread: For the eyes, nose, mouth, or other facial details
- Keychain ring: For turning the finished bunny into a bag charm
- Scissors: For cutting yarn and trimming ends
- Yarn needle: For sewing pieces together and weaving in ends
A smooth, durable yarn is usually easiest to use for a keychain because it shows the stitches clearly and tolerates regular handling. The yarn fiber and weight are not specified, so check the yarn label when selecting a hook and follow its care instructions.
Step-by-step instructions
-
Crochet the body.
Use white yarn to crochet the bunny’s body. Work with consistent tension so the fabric is firm enough to hold stuffing without leaving large gaps. -
Make the head separately.
Crochet the head in white yarn. Keep the shape neat and compact, since this piece will be attached to the top of the body. -
Attach the head to the body.
Use a yarn needle and white yarn to sew the head securely to the body. Check the alignment from the front and sides before fastening off. A few extra passes through the join can help the head withstand movement when the bunny is used as a keychain. -
Crochet the long ears.
Make the ears with the same white yarn. Position them evenly on the head, then sew them firmly in place. Before weaving in the ends, compare both ears from the front so they sit at a similar angle. -
Make the orange dress.
Crochet the small dress using orange yarn. Fit it around the bunny as you work or before securing it, making sure it sits evenly on the body. -
Add the stuffing.
Stuff the bunny gradually to give it shape. Push small amounts into the body and head rather than adding one large handful. Avoid overstuffing, which can stretch the stitches and distort the joins. -
Embroider the face.
Use embroidery thread to create the facial features. Keep the stitches small and secure the thread on the back or inside of the piece. Place the eyes carefully before completing the remaining details, as even positioning makes a noticeable difference to the bunny’s expression. -
Attach the keychain ring.
Secure the completed bunny to the keychain ring. Attach the ring through a strong, reinforced point, such as the top of the head or another sturdy section, and check that the connection holds before placing it on a bag. -
Finish the ends.
Weave in all loose yarn and thread ends neatly. Trim only after the ends are secure so the bunny remains tidy during everyday use.
Ways to use your finished project
The finished bunny is designed to be both decorative and practical. Try using it as:
- A charm for a handbag, backpack, or purse
- A cheerful keychain
- A small Easter basket gift
- A handmade birthday or baby-shower favor
- A craft-fair item
- A coordinated set of animal bag charms
- A seasonal accessory in pastel or spring colors
For a shop or craft fair, display several bunnies in different dress colors. Because the original instructions do not state whether finished items may be sold, check the original designer’s usage terms before offering them for sale.
How to care for your crochet project
Care depends on the yarn fiber, so always check the yarn label first. When the fiber is unknown, gentle hand washing is the safest option.
- Hand wash in cool or lukewarm water with a mild detergent.
- Avoid twisting or wringing the bunny, which may stretch the body or loosen the attached pieces.
- Press it gently in a towel to remove excess water.
- Reshape the ears, head, dress, and body while damp.
- Lay the bunny flat to dry completely.
- Keep it away from high heat, which can shrink or distort some yarns.
- Store it in a dry place away from direct sunlight to help prevent fading.
- Check the keychain connection occasionally, especially if the bunny is used daily.
If the dress is made with a strongly colored yarn, test for colorfastness before washing to reduce the risk of orange dye transferring to the white yarn.
Tips for success
- Use firm, even tension. Loose stitches can create holes that reveal the stuffing.
- Choose a suitable hook. If the fabric looks open, try a smaller hook, provided it still allows you to work comfortably.
- Use a stitch marker. Small stuffed pieces can be difficult to track, especially when working in continuous rounds.
- Stuff gradually. Add small amounts and shape the body with your fingers as you go.
- Check alignment before sewing. Look at the bunny from the front, back, and sides before permanently attaching the head and ears.
- Reinforce stress points. The head join and keychain attachment need secure stitching because the bunny will move when it hangs from a bag.
- Plan the face first. Place the eyes temporarily with pins or small removable markers before embroidering.
- Secure every end. Loose ends can pull out with regular handling, so weave them through several stitches.
- Avoid overloading the ring. A lightweight keychain ring is appropriate for a tiny bunny; heavy items may strain the attachment point.
Customize your project
There are several easy ways to personalize this crochet bunny:
- Replace the orange dress with pink, yellow, blue, green, or lavender.
- Use a contrasting color for small dress details if the design allows.
- Embroider eyelashes, rosy cheeks, whiskers, or a different mouth.
- Add a tiny embroidered flower or heart to the dress.
- Make a set with different dress colors for siblings or friends.
- Use a slightly thicker yarn for a larger bunny or finer yarn for a smaller one.
- Match the keychain ring and dress color for a coordinated finish.
Changing yarn weight or hook size will affect the finished size and may change how much stuffing is needed. Thicker yarn generally creates a larger, heavier charm, while finer yarn produces a more delicate figure. A different fiber can also affect softness, stitch definition, and durability.
Frequently asked questions
Is this crochet bunny beginner-friendly?
Yes. It is suitable for an advanced beginner who understands basic crochet and can sew pieces together. The main challenge is working neatly on a small scale and attaching the parts securely.
What yarn works best for the bunny?
A smooth yarn with clear stitch definition is a practical choice. Cotton or a cotton blend can give the bunny a firm, durable surface, while acrylic may feel softer and offer more color choices. Use a yarn weight and hook combination that produces a dense fabric.
Can I use a different crochet hook size?
Yes, but the hook size changes the finished result. A smaller hook usually creates firmer fabric and a smaller bunny, while a larger hook may create a larger piece with looser stitches. If the fabric has visible gaps, use a smaller hook or tighten your tension.
How long does this project take?
The exact time is not specified and will depend on your crochet speed, yarn size, and experience. Since the bunny uses several small components rather than a large piece, it is generally suited to a short crafting session or a weekend project.
How can I make the bunny larger or smaller?
Change the yarn weight and hook size consistently throughout the project. Larger yarn and a larger hook will usually increase the size, while finer yarn and a smaller hook will reduce it. The dress and keychain attachment may also need adjustment.
How do I keep the bunny’s ears even?
Attach both ears only after comparing their position from the front and sides. Use temporary pins or markers to check the placement, and sew each ear with several secure stitches.
Why does my stuffed bunny look lumpy?
Lumps usually come from adding too much stuffing at once or packing the stuffing unevenly. Add small amounts gradually, working them into narrow areas with the blunt end of your yarn needle or a stuffing tool.
How should I wash the finished bunny?
Follow the yarn-label instructions. If the fiber is unknown, hand wash it gently in cool water, avoid wringing, reshape it, and dry it flat.
Can I sell finished bunnies made from this pattern?
The supplied instructions do not state the designer’s selling permissions. Check the original pattern’s terms before selling finished items, and do not represent the pattern itself as your own.