Easy Crochet Pumpkin Free Pattern (3 Sizes)
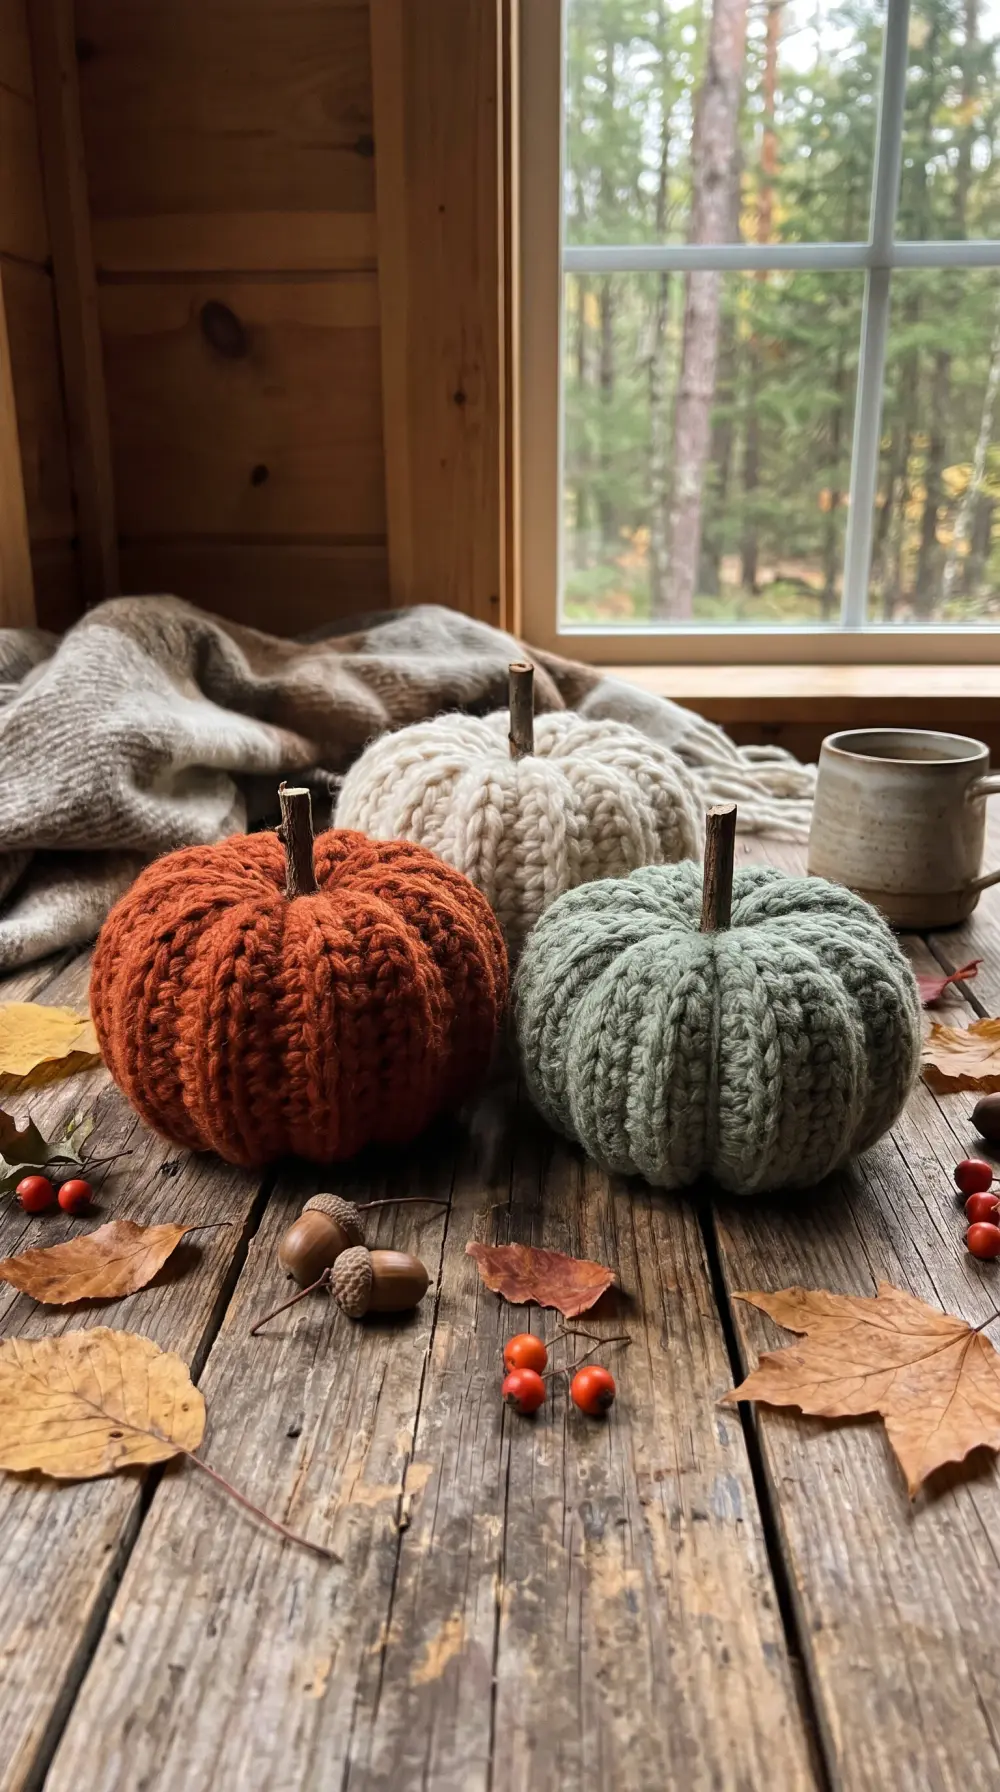
Make cozy ribbed crochet pumpkins in small, medium and large from one simple rectangle — a beginner-friendly fall decor pattern you can finish in an evening.
- Skill level
- Beginner
- Time
- 1–2 hours
- Yarn
- Worsted weight (#4)
- Hook
- 5 mm (H-8)
- Finished size
- 3.5 / 5 / 6.5 in tall
This post may contain affiliate links. If you buy through them we may earn a small commission at no extra cost to you. Learn more.
There’s a reason crochet pumpkins show up on every mantel each fall: they’re fast, forgiving, and they look far more impressive than the effort they take. This version is worked as one flat rectangle in back-loop half double crochet, which gives you those soft, natural ribs without any shaping. Then you seam it, gather it, and wrap it into segments.
Thank you for reading this post, don't forget to subscribe!The same pattern makes three sizes, so you can build a little pumpkin patch from leftover yarn.
Why you’ll love this pattern
- Only one stitch. If you can half double crochet, you can make this.
- No counting rounds. It’s worked flat in rows, so it’s easy to pick up and put down.
- Scrap-friendly. The small size uses about 40 yards of yarn.
- Three sizes from one pattern — perfect for a table centerpiece.
Materials
- Worsted weight (#4) yarn — about 40 / 75 / 120 yards for small / medium / large
- 5 mm (H-8) crochet hook
- Polyester fiberfill stuffing
- Tapestry needle and scissors
- Brown or green scrap yarn (or a cinnamon stick) for the stem
Yarn tip: Soft acrylic or an acrylic–wool blend gives the plumpest ribs. Chenille yarn works too and looks velvety, but the ribs will be less visible.
Abbreviations (US terms)
| Abbreviation | Meaning |
|---|---|
| ch | chain |
| hdc | half double crochet |
| BLO | back loop only |
| sl st | slip stitch |
| st(s) | stitch(es) |
Gauge
Gauge isn’t critical for decor. For reference: 14 hdc BLO and 10 rows = 4 in (10 cm).
The pattern
Instructions are written as small (medium, large).
Step 1: The ribbed rectangle
- Foundation: Ch 16 (21, 26).
- Row 1: Hdc in 3rd ch from hook and in each ch across. Turn. — 14 (19, 24) hdc
- Row 2: Ch 1 (does not count as a st), hdc BLO in each st across. Turn. — 14 (19, 24) hdc
- Rows 3–24 (30, 36): Repeat Row 2.
- Fasten off, leaving a 20 in (50 cm) tail for sewing.
The rectangle should look like a ribbed strip. The rows run across the short side — these become the pumpkin’s vertical segments.
Step 2: Seam and gather
- Fold the rectangle so the first row meets the last row. Using the long tail and a tapestry needle, whip stitch the two short edges together to make a tube.
- Without cutting the yarn, weave the needle in and out along one open edge of the tube, about every second row. Pull tight to close the hole completely and make a few knots.
- Stuff firmly through the open end. Don’t be shy — pumpkins look best when they’re plump.
- Cut a new 18 in piece of yarn, weave it around the second open edge in the same way, pull tight and knot.
Step 3: Shape the segments
- Thread a long piece of the same yarn (about 40 in) onto the needle. Insert the needle from the top center straight down through the bottom center.
- Bring the yarn up around the outside of the pumpkin and back down through the top center. Pull firmly — you’ll see the first segment form.
- Repeat 4 more times, spacing the wraps evenly, for 5 segments total.
- Knot the yarn at the bottom center and hide the tail inside the pumpkin.
Step 4: The stem
- With brown or green yarn, ch 7.
- Sl st in 2nd ch from hook and in each ch across. — 6 sl sts
- Fasten off, leaving a tail. Roll the strip tightly, then sew it to the top center, going through the gathered hole.
- Shortcut: push a cinnamon stick or a small twig into the top center instead — it smells wonderful, too.
Finishing touches
- Add a crochet leaf or a bit of twine tied around the stem for a farmhouse look.
- Mix colors: rust, cream and sage look beautiful together, as do white, blush and soft gold.
- For a heavier pumpkin that won’t tip over, put a small bag of rice or poly pellets in the bottom before stuffing.
Common mistakes to avoid
- Working in both loops. The ribs only appear when every row after Row 1 is worked in the back loop.
- Under-stuffing. A soft pumpkin collapses when you wrap it. Stuff until it feels firm.
- Loose wraps. Pull each wrap snug before starting the next one, or the segments won’t hold their shape.
Make a whole patch in an afternoon and you’ve got a centerpiece, hostess gifts and Thanksgiving place-card holders all in one go. Happy hooking!
Frequently asked questions
Can I make these pumpkins with chunky yarn?
Yes. Use a bulky (#5) yarn with a 6.5 mm hook and follow the same counts — each pumpkin will come out roughly 30% larger.
Why does my pumpkin look flat instead of round?
It usually needs more stuffing or tighter gathering. Pack the stuffing firmly, then pull the gathering tails as tight as they will go before tying off.
How do I make the segments more defined?
Wrap the yarn tightly around the pumpkin six times (rather than five) and pull each wrap snug through the center before moving to the next.