Easy Crochet Sweater Vest Free Pattern (Sizes S–XL)
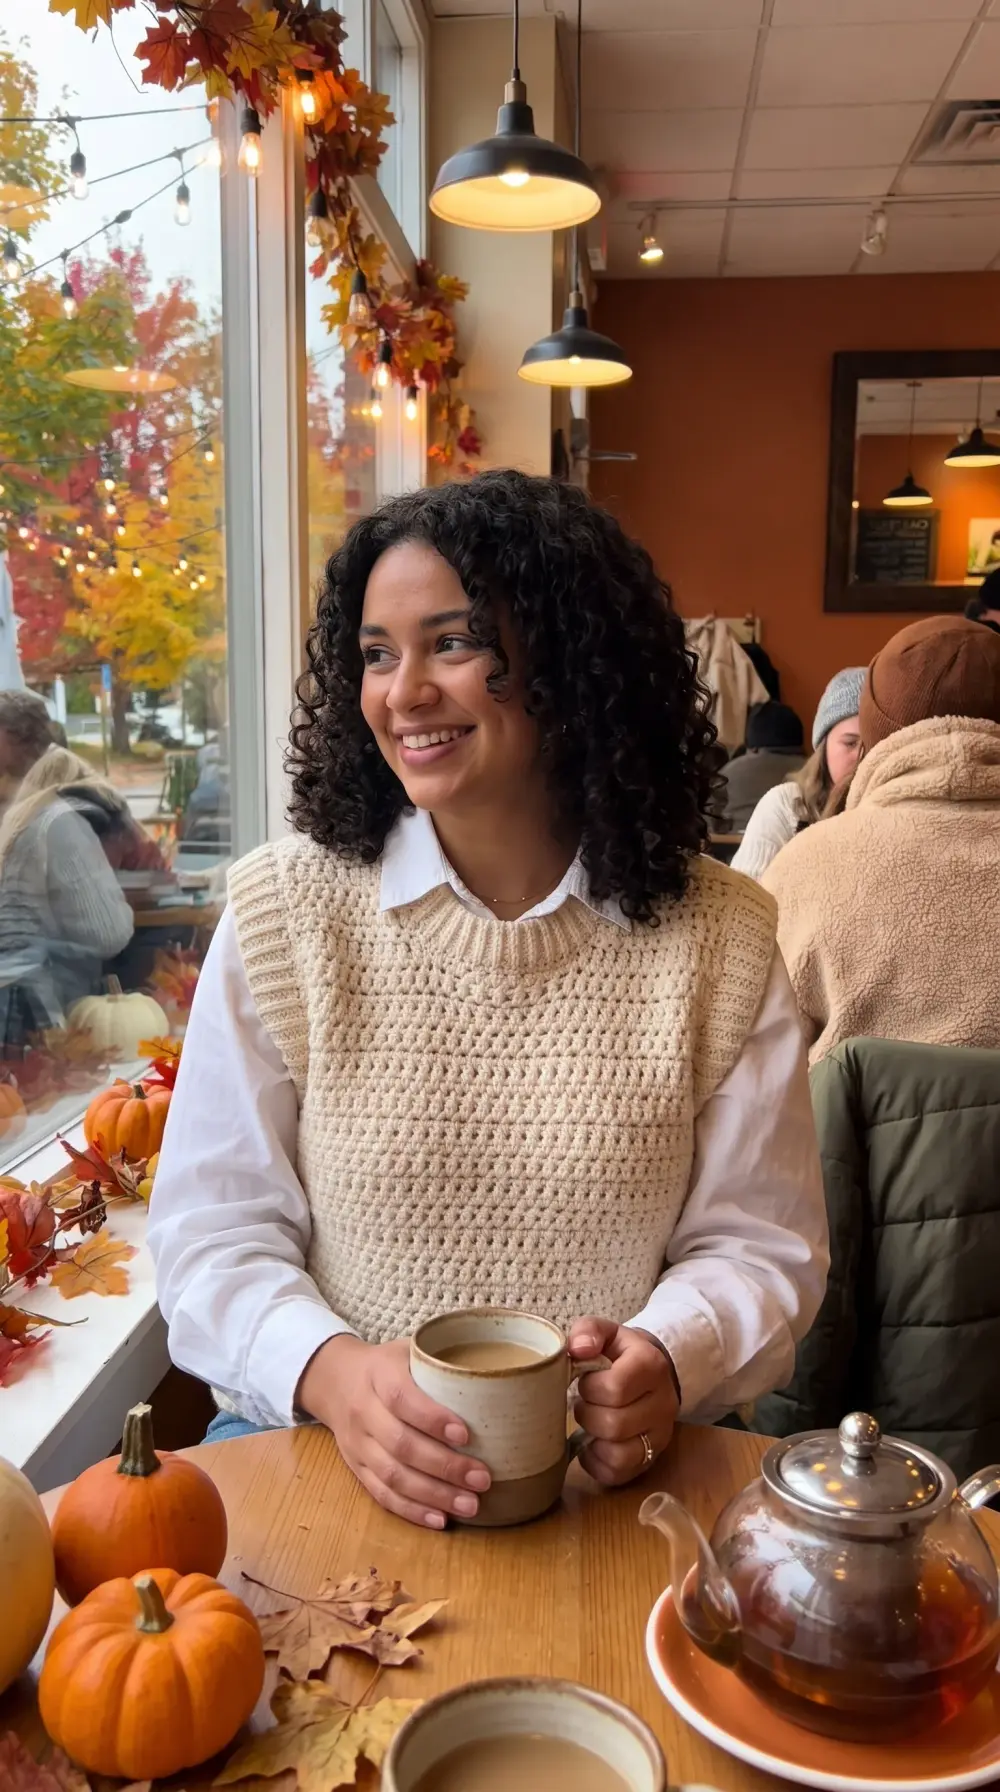
A cozy, textured crochet sweater vest made from two simple panels in moss stitch — beginner-friendly construction with a V-neck and ribbed edges, sizes S to XL.
- Skill level
- Easy
- Time
- 10–14 hours
- Yarn
- Worsted weight (#4)
- Hook
- 5.5 mm (I-9)
- Finished size
- S, M, L, XL
This post may contain affiliate links. If you buy through them we may earn a small commission at no extra cost to you. Learn more.
A crochet sweater vest is the perfect “first garment”: no sleeves, no complicated shaping, and it layers over everything from a crisp shirt to a turtleneck. This one is made from two flat panels in moss stitch (also called linen stitch), which looks like a knit texture but is just single crochets and chains.
Thank you for reading this post, don't forget to subscribe!You’ll work a ribbed band first, crochet the body along its edge, then seam the shoulders and sides. That’s it.
Sizing
Choose your size by finished chest measurement. The vest is designed to be worn with about 4–6 in of ease.
| Size | Finished chest | Length (shoulder to hem) |
|---|---|---|
| S | 38 in (96 cm) | 21 in (53 cm) |
| M | 42 in (107 cm) | 21.5 in (55 cm) |
| L | 46 in (117 cm) | 22.5 in (57 cm) |
| XL | 50 in (127 cm) | 23 in (58 cm) |
Materials
- Worsted weight (#4) yarn — approx. 750 (850, 950, 1050) yards
- 5.5 mm (I-9) crochet hook
- 5 mm (H-8) hook for the ribbing
- Stitch markers, tapestry needle, scissors, measuring tape
Abbreviations (US terms)
| Abbreviation | Meaning |
|---|---|
| ch | chain |
| sc | single crochet |
| sc BLO | single crochet in back loop only |
| ch-sp | chain space |
| sl st | slip stitch |
| sk | skip |
Gauge
16 stitches (8 sc + 8 ch-1 spaces) and 18 rows = 4 in (10 cm) in moss stitch with a 5.5 mm hook.
Please make a 5 in swatch before you start. Gauge matters for garments — if your swatch is too small, go up a hook size; too big, go down.
Pattern notes
- The vest is made of a back panel and a front panel. Each starts with a ribbing band worked sideways, then the body is worked up from the side of the ribbing.
- In moss stitch, every sc and every ch-1 counts as one stitch.
- Instructions are written as S (M, L, XL).
The pattern
Step 1: Bottom ribbing (make 2)
With the 5 mm hook:
- Ch 9.
- Row 1: Sc in 2nd ch from hook and in each ch across. Turn. — 8 sc
- Row 2: Ch 1, sc BLO in each st across. Turn.
- Repeat Row 2 until the ribbing measures 19 (21, 23, 25) in when slightly stretched. Do not fasten off.
Step 2: The body (back panel)
Switch to the 5.5 mm hook. You’ll now work along the long edge of the ribbing.
- Row 1: Ch 1, work 77 (85, 93, 101) sc evenly along the side edge of the ribbing. Turn.
- Row 2 (set-up): Ch 2 (counts as sc + ch 1), sk next st, sc in next st, ch 1, sk next st — repeat from * across, ending sc in last st. Turn.
- Row 3 (moss stitch): Ch 2 (counts as sc + ch 1), sc in first ch-sp, ch 1, sc in next ch-sp — repeat from * across, ending sc in the turning ch-sp. Turn.
- Repeat Row 3 until the piece measures 13 (13.5, 14, 14.5) in from the bottom edge of the ribbing.
Armholes:
- Next row: Sl st across the first 8 (10, 12, 14) sts. Ch 2, then work moss stitch across until 8 (10, 12, 14) sts remain. Turn, leaving the remaining sts unworked.
- Continue in moss stitch until the armhole measures 8 (8, 8.5, 8.5) in.
- Fasten off.
Step 3: The body (front panel with V-neck)
Work exactly like the back panel up to and including the armhole row. Place a marker in the center ch-sp.
Left front:
- Work in moss stitch up to the marker. Turn, leaving the other half unworked.
- Decrease row (neck edge): Work in pattern to the last ch-sp at the neck edge, sc in the last sc and stop — one ch-sp fewer at the neck edge.
- Repeat the decrease row every other row until the armhole measures 8 (8, 8.5, 8.5) in. Fasten off.
Right front:
- Join yarn at the marker and work the second half to mirror the first, decreasing at the neck edge every other row.
Step 4: Assembly
- Block both panels to the measurements in the size table. Pin them, mist with water and let them dry fully.
- Lay the front on top of the back, right sides together. Seam the shoulders with a whip stitch or sl st seam.
- Seam the sides from the bottom of the ribbing to the start of the armholes.
Step 5: Neck and armhole edging
With the 5 mm hook and right side facing:
- Neckline: Join yarn at the back neck. Ch 1, sc evenly around the neckline, working a sc2tog at the point of the V. Join with sl st. Work 2 more rounds the same way.
- Armholes: Join yarn at the underarm seam. Ch 1, sc evenly around. Join with sl st. Work 1 more round.
- Weave in all ends.
Styling ideas
- Over a white button-down with jeans for an easy fall look (like the photo above).
- Over a long-sleeve turtleneck for winter.
- On its own over a tank in spring, if you make it in cotton.
Tips for a perfect fit
- Swatch and block your swatch. Moss stitch relaxes a little after washing.
- Measure, don’t count rows. Your row gauge may differ — trust the tape measure.
- Try it on before the edging. Pin the shoulders together and check the length; it’s easy to add or remove rows at this stage.
Once you’ve made one, you’ll want this vest in every color. Stripe it, add a contrasting ribbing, or make it longer for a tunic.
Frequently asked questions
How much ease does this vest have?
About 4–6 in (10–15 cm) of positive ease for a relaxed fit. Choose the size whose finished chest is 4–6 in bigger than your actual chest.
Can I make it longer or cropped?
Yes. The body length is worked to a measurement, so simply work more or fewer rows before the armholes and note the number so the front and back match.
Which yarn gives the best drape?
A wool or wool-blend worsted gives the softest drape and keeps you warm. Cotton works for a spring version but will be heavier.