Large Hexagon Crochet Baby Blanket Pattern
This post may contain affiliate links. If you buy through them we may earn a small commission at no extra cost to you. Learn more.
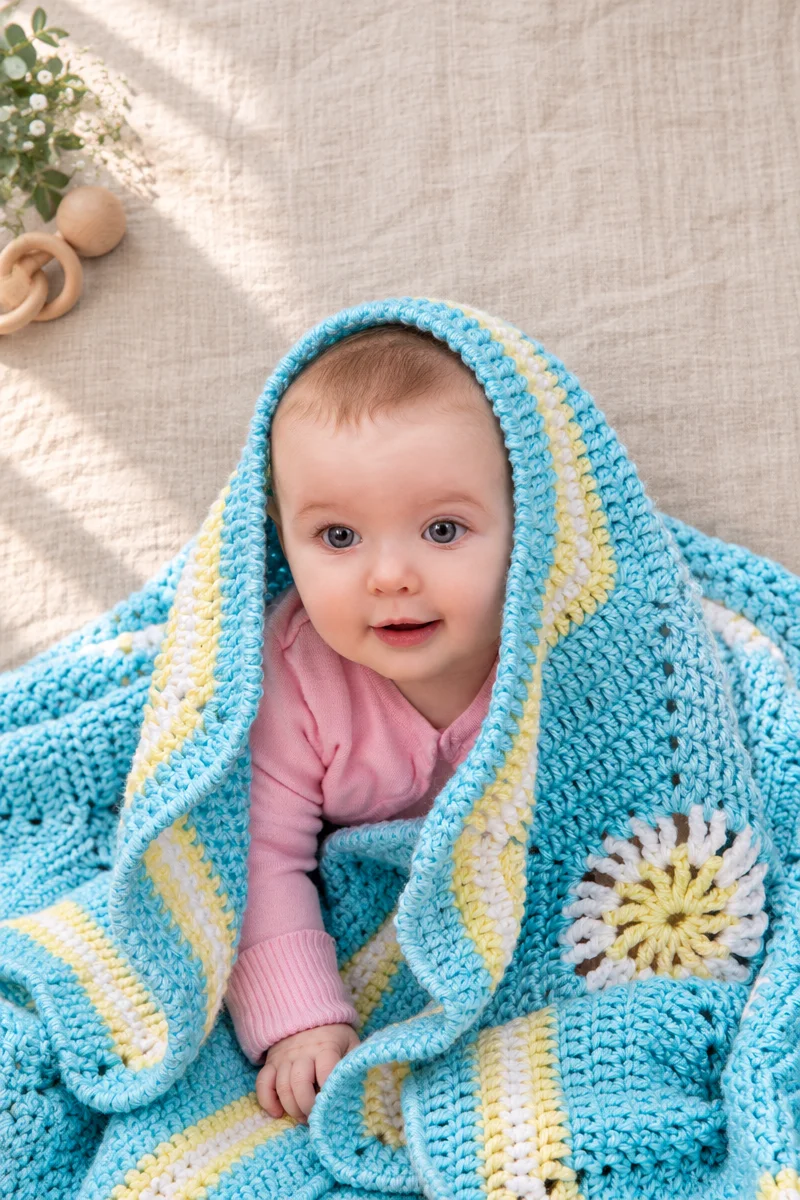
This big hexagon crochet baby blanket combines colorful geometric motifs with a soft, practical border. The construction is rewarding because each hexagon is made separately, then joined into a larger blanket. It is a lovely handmade baby-shower gift, nursery accent, or relaxing project for crocheters who enjoy working in manageable sections.
Thank you for reading this post, don't forget to subscribe!Why You’ll Love This Crochet Pattern
This blanket offers several useful advantages:
- Portable construction: Individual motifs are easy to carry and work on anywhere.
- Skill-building practice: You will practice treble crochet, double crochet, half double crochet, decreases, color changes, and joining.
- Handmade gift appeal: The soft colors and geometric design suit baby blankets and nursery décor.
- Organized colorwork: The two motif styles create visual contrast without complicated colorwork within a round.
- Neat finishing: The multi-round border frames the joined hexagons and adds a polished edge.
- Relaxing repetition: Once the first motif is complete, the remaining motifs follow a predictable rhythm.
“The motifs were enjoyable to make, and the color changes gave the blanket a cheerful baby-friendly look. Keeping the assembly diagram nearby made joining much easier.”
How This Crochet Blanket Comes Together
The blanket is made from 14 large hexagonal motifs:
- Make 8 Motif A pieces.
- Make 6 Motif B pieces.
- Join them with a whipstitch following the assembly diagram.
- Add a seven-round border around the assembled blanket.
Each motif begins with a six-chain ring. The first two rounds use treble crochet and chain spaces. The remaining rounds build the hexagon with double crochet stitches, corner increases, and chain-2 spaces.
The pattern is suitable for an advanced beginner or intermediate crocheter. You should be comfortable joining rounds, changing colors, working into spaces, counting stitches, and making decreases. The total time depends on your tension, experience, and available crochet time because the pattern does not provide a fixed completion estimate.
Keep the assembly diagram available. It is required for motif placement, whipstitching, and locating the border join.
Materials You’ll Need
- RED HEART® Soft Baby Steps™ yarn
- 4 skeins, color 9505 Aqua C
- 1 skein, color 9600 White A
- 1 skein, color 9200 Baby Yellow B
- 6.0 mm crochet hook, US J-10
- Yarn needle
- Stitch markers
The listed yarn is designed for soft baby projects. Check the yarn label for its exact fiber content and washing instructions before laundering the finished blanket.
The pattern uses the color labels A, B, and C as follows:
- A: White, color 9600
- B: Baby Yellow, color 9200
- C: Aqua, color 9505
A different yarn can change the blanket’s size, thickness, drape, and yarn requirements. If substituting, choose a yarn with a similar weight and make a sample first.
Step-by-Step Instructions
Special Abbreviations
- hdc2tog: Yarn over, insert the hook into the indicated stitch or space and draw up a loop twice, yarn over, and draw through all loops on the hook.
- dc2tog: Yarn over, insert the hook into the indicated stitch or space and draw up a loop, yarn over, and pull through 2 loops. Repeat once more, then yarn over and draw through all 3 loops on the hook.
- Reverse sc: Working from left to right, insert the hook into the next stitch to the right, yarn over, draw the yarn through the stitch, yarn over, and draw through both loops on the hook.
Make Motif A
Make 8 motifs.
With color A, chain 6. Join with a slip stitch to form a ring.
Round 1
- Chain 4. This counts as the first treble crochet and chain 1.
- Work 1 treble crochet into the ring, then chain 1.
- Repeat the previous step 11 times.
- Slip stitch into the third chain of the beginning chain-4 to join.
You should have 12 chain-1 spaces. Fasten off.
Round 2
- With the right side facing, join color B in any chain-1 space.
- Chain 4. This counts as the first treble crochet.
- Work 1 treble crochet into the same space.
- Chain 1, then work 2 treble crochet stitches into the next chain-1 space.
- Repeat the previous step around.
- Chain 1 and slip stitch to the top of the beginning chain-4.
You should still have 12 chain-1 spaces. Fasten off.
Round 3
- With the right side facing, join color C in any chain-1 space.
- Chain 3. This counts as the first double crochet.
- Work 1 double crochet into the same space.
- Repeat the following sequence around:
- Work 1 double crochet between the next 2 treble crochet stitches.
- Work 2 double crochet stitches into the next chain-1 space.
- Work 1 double crochet between the next 2 treble crochet stitches.
- Work 2 double crochet stitches, chain 2, and 2 double crochet stitches into the next chain-1 space.
- At the end of the final repeat, work 2 double crochet stitches into the same chain-1 space as the beginning chain-3.
- Chain 1, then work 1 single crochet into the top of the beginning chain-3 to create the final chain-2 corner space.
There should be 8 double crochet stitches across each side.
Round 4
- Chain 3. This counts as the first double crochet.
- Work 1 double crochet in each double crochet stitch across to the next chain-1 space.
- Work 1 double crochet, chain 2, and 1 double crochet into that chain-1 space.
- Work 1 double crochet in each of the next 8 double crochet stitches.
- Repeat around.
- At the end, work 1 double crochet in the first chain-1 space.
- Chain 1 and slip stitch into the top of the beginning chain-3.
There should be 10 double crochet stitches across each side.
Round 5
- Chain 3.
- Repeat around:
- Work 1 double crochet in each double crochet stitch across to the next chain-1 space.
- Work 1 double crochet, chain 2, and 1 double crochet into the chain-1 space.
- Work double crochet stitches across to the beginning.
- Slip stitch into the top of the beginning chain-3 to join.
There should be 12 double crochet stitches across each side.
Rounds 6–7
Repeat Round 5 for two more rounds.
There should be 16 double crochet stitches across each side in Round 7. Fasten off.
Make Motif B
Make 6 motifs.
Work Motif B in the same way as Motif A, using these color changes:
- Use color B for the starting ring.
- Use color A for Round 1.
- Use color A for Round 2.
- Use color C for Rounds 3–7.
Fasten off after Round 7.
Assemble the Motifs
- Arrange the 14 motifs according to the assembly diagram.
- Use color C and a yarn needle.
- Whipstitch the motifs together, following the connections shown in the assembly diagram.
- Keep the joins even, and avoid pulling the yarn tightly enough to pucker the fabric.
The diagram is essential because the written instructions do not provide the complete motif-placement layout.
Add the Border
With the right side facing, join color C in the chain-2 space indicated on the assembly diagram.
Border Round 1
- Chain 3. This counts as the first double crochet.
- Work 1 double crochet in each of the next 15 double crochet stitches.
- Work a dc2tog across the next double crochet and the next chain-2 space.
- Place a stitch marker in the last stitch made.
- Skip the seam between motifs.
- Work a dc2tog across the next chain-2 space and the next double crochet.
- Work 1 double crochet in each of the next 15 double crochet stitches.
- Work 1 double crochet, chain 2, and 1 double crochet in the next chain-2 space.
- Repeat the previous two steps once.
- Work 1 double crochet in each of the next 15 double crochet stitches.
- Work a dc2tog across the next double crochet and the next chain-2 space.
- Place a stitch marker in the last stitch made.
- Skip the seam between motifs.
- Work a dc2tog across the next chain-2 space and the next double crochet.
- Continue around, working double crochet stitches in the double crochet stitches, 2 decreases at each valley, and 1 double crochet, chain 2, and 1 double crochet in each chain-2 space.
- Finish by working into the same chain-2 space as the beginning chain-3.
- Chain 2 and slip stitch to the top of the beginning chain-3.
Border Round 2
- Chain 3. This counts as the first double crochet.
- Work double crochet stitches across to 2 stitches before the first marker.
- Work dc2tog over the next 2 stitches twice.
- Work double crochet stitches across to the next chain-2 space.
- Work 1 double crochet, chain 2, and 1 double crochet in the chain-2 space.
- Repeat the previous two steps once.
- Continue around, working double crochet stitches across the sides, 2 decreases at each valley, and a double crochet corner increase in each chain-2 space.
- Slip stitch into the top of the beginning chain-3 to join.
Fasten off.
Border Round 3
- With the right side facing, join color B in the last chain-2 space.
- Repeat Border Round 2.
Fasten off.
Border Round 4
- With the right side facing, join color A in the last chain-2 space.
- Chain 2. This counts as the first half double crochet.
- Work half double crochet stitches across to 2 stitches before the first marker.
- Work hdc2tog over the next 2 stitches twice.
- Work half double crochet stitches across to the next chain-2 space.
- Work 1 half double crochet, chain 2, and 1 half double crochet in the chain-2 space.
- Repeat the previous two steps once.
- Continue around, working half double crochet stitches across the sides, 2 decreases at each valley, and a half double crochet corner increase in each chain-2 space.
- Slip stitch into the top of the beginning chain-2 to join.
Fasten off.
Border Round 5
With color B, repeat Border Round 3.
Border Round 6
With color C, repeat Border Round 3.
Border Round 7
- Chain 1.
- Working from left to right, work 1 reverse single crochet in each stitch around.
- Work 1 reverse single crochet in each chain-2 space.
- Slip stitch into the first reverse single crochet to join.
Fasten off.
Finish the Blanket
Use a yarn needle to weave in all ends securely on the wrong side. Trim excess yarn only after the ends are anchored.
Ways to Use Your Finished Blanket
This hexagon blanket makes a thoughtful handmade baby-shower gift or new-baby present. It can also be used as:
- A nursery throw for a crib, rocking chair, or reading corner
- A decorative layer over a changing-table chair
- A stroller or car-seat blanket, with appropriate supervision
- A photography prop for milestone pictures
- A cheerful accent for a child’s room
- A handmade item for a craft fair or online shop, subject to the original designer’s usage terms
For babies, avoid loose embellishments such as buttons, beads, or detachable appliqués.
How to Care for Your Crochet Project
Follow the care instructions on the RED HEART® Soft Baby Steps™ yarn label. In general:
- Wash gently using the label-recommended water temperature.
- Use a mild detergent.
- Avoid harsh bleach unless the yarn label specifically permits it.
- Support the blanket when wet so its weight does not stretch the joins.
- Reshape it while damp and dry it flat.
- Keep it away from high heat unless the yarn label confirms that machine drying is suitable.
- Do not hang the blanket for long-term storage.
- Store it clean and completely dry in a breathable container.
- Keep strong colors from sitting wet against one another to reduce the risk of color transfer.
If the blanket becomes uneven after washing, gently smooth the hexagon edges and corners back into shape while it dries.
Tips for Success
- Count every round. The motif sides increase from 8 to 10, 12, and finally 16 double crochet stitches.
- Mark the valley decreases. The stitch markers in the border help you find the same decrease points in later rounds.
- Keep the corners open. Work the stated chain-2 spaces clearly so the hexagons and border lie flat.
- Check the right side before joining colors. Several rounds begin with the right side facing.
- Do not over-tighten slip stitches. Tight joins can pull the hexagon out of shape.
- Fasten off neatly after each color section. Secure the tails later during finishing, or weave them in as you go.
- Use the assembly diagram. Correct placement matters because Motif A and Motif B use different color arrangements.
- Whipstitch evenly. Take consistent stitches through corresponding loops or edge stitches to create a smooth seam.
- Watch the border valleys. Missing one of the two decreases can make the edge flare; adding extra decreases can cause puckering.
- Block gently if needed. Light blocking can improve the shape, but avoid stretching the blanket aggressively.
Creative Ways to Customize the Blanket
- Change the palette: Replace the aqua, white, and yellow combination with pink and cream, sage and ivory, or a gender-neutral mix.
- Use a contrasting border: A darker final round can emphasize the hexagon outline.
- Create a larger blanket: Add more complete motifs before assembly. The layout must remain balanced, and additional motifs will increase yarn requirements.
- Make a smaller version: Use fewer motifs in a symmetrical arrangement. The finished shape and dimensions will depend on the chosen layout.
- Try seasonal colors: Use warm rust, cream, and gold for autumn, or icy blue, white, and silver-inspired shades for winter.
- Add surface embroidery: Simple stitched stars or initials can personalize individual motifs, provided all details are securely sewn.
- Coordinate accessories: Use the same color palette for a matching cushion, small lovey, or nursery basket liner. Different projects may require different yarn amounts and care methods.
Changing yarn weight or hook size will affect motif size, drape, thickness, and the amount of yarn needed. Recalculate the layout before committing to a full-size blanket.
Frequently Asked Questions
Is this hexagon crochet blanket beginner-friendly?
It is a good choice for an advanced beginner who understands basic crochet terminology. The motifs are repetitive, but you should be comfortable with treble crochet, color changes, decreases, joining rounds, and reading a diagram.
How many motifs are needed?
The pattern uses 14 motifs total: 8 Motif A pieces and 6 Motif B pieces.
What yarn works best for this pattern?
The specified yarn is RED HEART® Soft Baby Steps™ in the listed colors. A similar-weight soft baby yarn may work, but changing yarn can alter the blanket’s size, drape, texture, and yarn requirements.
Can I use a different hook size?
Yes, but the finished motifs may become larger or smaller. A larger hook generally creates a looser, drapier fabric, while a smaller hook creates a denser fabric. Make a gauge sample or complete one motif first to assess the result.
How long will the blanket take to make?
The source pattern does not give an exact completion time. Your total time will depend on crochet speed, tension, interruptions, and how quickly you assemble and finish the motifs.
How can I make the blanket larger?
Add more motifs using a balanced arrangement based on the assembly diagram. You will need additional yarn, and the final dimensions will depend on the number and arrangement of motifs.
Why is my motif curling?
Slight curling can result from tight tension, crowded stitches, or tight joining stitches. Check that the corner chain-2 spaces are open, avoid pulling the slip stitches tightly, and block the completed motifs gently if necessary.
How do I keep the border edges even?
Place the markers exactly where instructed in Border Round 1. Work the two decreases at each valley consistently and make sure every chain-2 space receives the stated corner stitches.
How should I wash the finished blanket?
Follow the yarn label. Use gentle washing, mild detergent, and low handling. Support the wet blanket, reshape it, and dry it flat to help prevent stretching.
Can I sell blankets made from this pattern?
The provided pattern information does not state its licensing or finished-item policy. Check the original designer or publisher’s usage terms before selling finished blankets or using the pattern commercially.
How much yarn do I need?
You need 6 skeins in total: 4 skeins of Aqua C, 1 skein of White A, and 1 skein of Baby Yellow B. Actual usage can vary with tension, so keep the yarn labels and purchase from the same dye lot when possible.