This post may contain affiliate links. If you buy through them we may earn a small commission at no extra cost to you. Learn more.
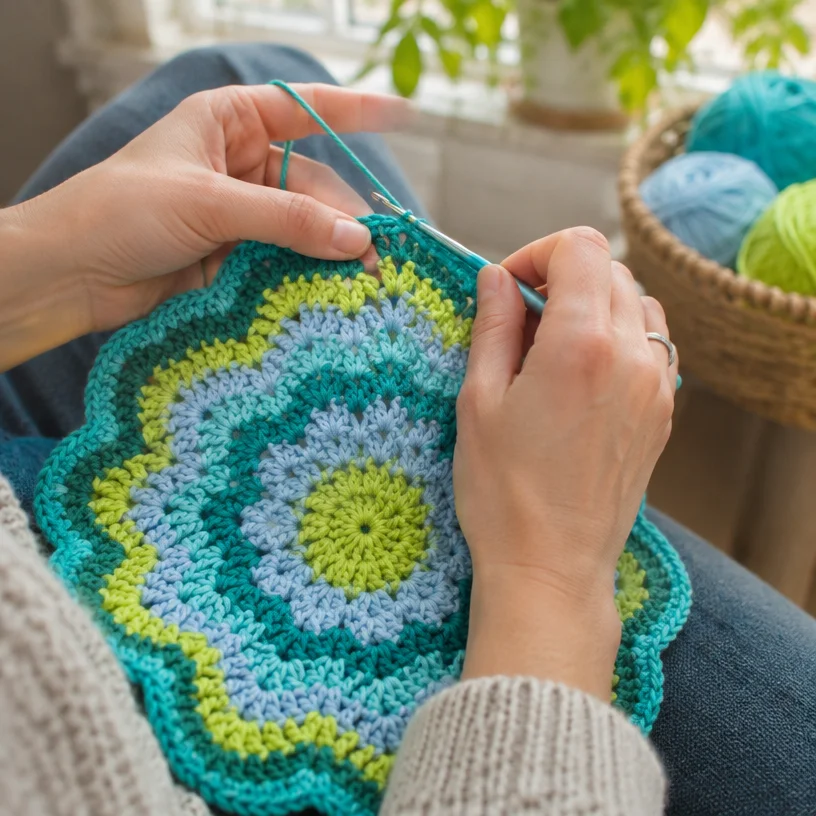
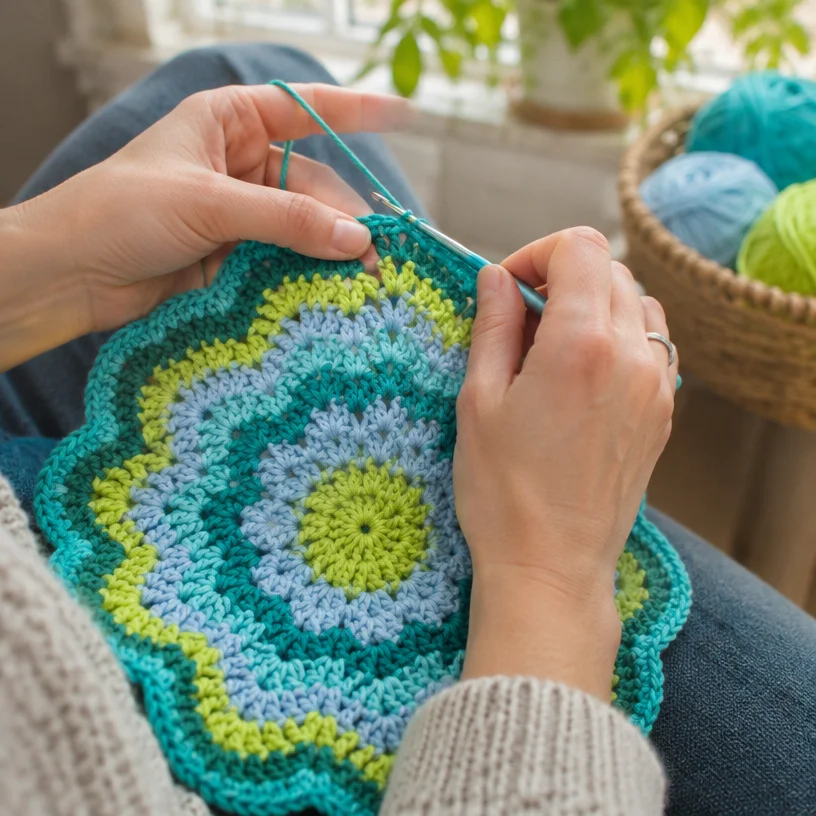
The Beach Time Hexagon Crochet Blanket is a cheerful, colorful project built from a single expanding hexagon shape. Soft puff stitches create a raised texture, while bands of lime, aqua, jadie, and baby blue give the blanket a bright seaside feel. It is a relaxing project for confident beginners and experienced crocheters alike, whether you are making a cozy home accent, a baby gift, or a portable project for travel.
Thank you for reading this post, don't forget to subscribe!
Why you’ll love this pattern
This crochet blanket combines simple repeating rounds with attractive color changes. Once the first few rounds are established, the stitch pattern becomes easy to recognize and follow.
The puff stitches add texture without complicated shaping.
The repeating round makes the blanket relaxing to crochet.
The color sequence creates a summery beach-inspired design.
The growing hexagon is portable and easy to work one round at a time.
The finished blanket makes a thoughtful handmade gift.
The puff texture works beautifully as a decorative throw for a nursery, bedroom, or living room.
“The color changes make this blanket so enjoyable to crochet. After the center was finished, the rounds became very rhythmic, and the puff stitches gave the blanket a lovely soft texture.”
How this crochet pattern comes together
The blanket begins with a six-chain ring. The first round establishes six puff stitches and six chain spaces. The next rounds place puff V-stitches into the spaces, creating the six-sided hexagon shape.
From Round 3 onward, the basic repeat expands the blanket by adding puff stitches and chain spaces between the six main puff V-stitches. Color changes are worked according to a set sequence through Round 29. A contrasting shell edging is added around the completed blanket.
The main skills include chaining, slip stitching, puff stitches, puff V-stitches, double crochet, single crochet, color changes, and working in joined rounds. The pattern is suitable for an adventurous beginner who is comfortable reading stitch instructions and maintaining a repeating round.
Because the source pattern does not provide finished measurements or a precise completion time, the final size and working time will depend on your tension and pace.
Materials you’ll need
RED HEART® Soft Baby Steps®
2 balls of 9630 Lime D — Color A
1 ball of 9505 Aqua A — Color B
1 ball of 9530 Jadie B — Color D
1 ball of 9800 Baby Blue C — Color C
Susan Bates® crochet hook: 6.5 mm [US K-10.5]
Yarn needle
The listed yarn is a soft baby yarn designed for comfortable blankets and nursery projects. Use the yarn label as your guide for fiber content and laundering instructions.
A different yarn may be used, but changing the yarn weight or fiber can affect the blanket’s size, drape, thickness, and yardage requirements. If you substitute yarn, make sure all colors are a similar weight and use a hook that produces a fabric with good drape rather than a stiff fabric.
Step-by-step instructions
Abbreviations
beg: beginning
ch: chain
dc: double crochet
lg shell: large shell
sc: single crochet
sl st: slip stitch
sm shell: small shell
st/sts: stitch/stitches
A puff stitch is a group of partially completed stitches worked into the same space and closed together. A puff V-stitch is the puff-stitch version of a V-stitch, worked with a chain space between the two puff sections as written in the pattern.
Blanket
Color setup
Work the beginning of the blanket with Color A.
With Color A, chain 6.
Join with a slip stitch in the first chain to form a ring.
Round 1
Work a beginning puff stitch in the ring.
Chain 2.
Work a puff stitch in the ring.
Repeat Steps 2–3 four more times.
Chain 2.
Join with a slip stitch in the beginning puff stitch.
You should have 6 puff stitches and 6 chain-2 spaces.
Round 2
Slip stitch into the first chain-2 space.
Work a beginning puff V-stitch in the same space.
Chain 1.
Work a puff V-stitch in the next chain-2 space.
Repeat Steps 3–4 four more times.
Chain 1.
Join with a slip stitch in the beginning puff stitch.
You should have 6 puff V-stitches and 6 chain-1 spaces.
Round 3
Slip stitch into the chain-2 space of the first puff V-stitch.
Work a beginning puff V-stitch in the same space.
Chain 1.
Work a puff stitch in the next chain-1 space.
Chain 1.
Work a puff V-stitch in the next puff V-stitch.
Repeat Steps 3–6 three more times.
Chain 1.
Work a puff stitch in the last chain-1 space.
Chain 1.
Join with a slip stitch in the beginning puff stitch.
You should have 6 puff V-stitches and 12 chain-1 spaces.
Round 4
Repeat Round 3.
At the end of the round, you should have 6 puff V-stitches and 18 chain-1 spaces.
Round 5
Repeat Round 3.
Change to Color B at the end of the round.
You should have 6 puff V-stitches and 24 chain-1 spaces.
Rounds 6–29
Continue repeating the structure of Round 3. Work the colors in this sequence:
1 round with Color B
5 rounds with Color D
1 round with Color B
5 rounds with Color C
1 round with Color B
5 rounds with Color A
1 round with Color B
5 rounds with Color D
This completes Rounds 6–29. At the end of Round 29, you should have 6 puff V-stitches and 168 chain-1 spaces.
Fasten off.
Edging
Join Color B with a slip stitch in the chain-2 space of any puff V-stitch.
Chain 4. This counts as the first double crochet and chain 1.
In the same space, work:
1 double crochet,
(chain 1, double crochet) three times.
This forms the first large shell.
Repeat the following sequence across to the next puff V-stitch:
Chain 1.
Single crochet in the next chain-1 space.
Chain 1.
Work a small shell in the next chain-1 space.
Chain 1.
Work a large shell in the next puff V-stitch.
Repeat Steps 4–6 around the blanket.
Finish the final repeat at the beginning point.
Join with a slip stitch in the third chain of the beginning chain.
Fasten off.
Weave in all ends with a yarn needle.
Take care not to pull the edging tightly. A relaxed tension helps the outer edge lie flat.
Ways to use your finished project
Drape it over the back of a sofa or accent chair.
Use it as a lightweight nursery blanket or stroller blanket.
Fold it at the foot of a bed for a colorful decorative layer.
Give it as a handmade baby shower, birthday, or housewarming gift.
Use the beach-inspired color palette in a coastal or summer-themed room.
Photograph it as a handmade shop or craft-fair item, using clear information about the materials and finished dimensions once measured.
For baby use, check that all ends are securely woven in and inspect the blanket regularly for loose fibers or damaged stitches.
Washing and maintenance
Always check the care instructions on the yarn label before washing. For the listed baby yarn, gentle laundering is generally appropriate, but the label should take priority.
Wash with cool or lukewarm water.
Use a mild detergent and a gentle cycle if machine washing is permitted.
Avoid harsh bleach and high heat.
Support the blanket when wet so its weight does not stretch the puff stitches.
Reshape it gently and dry it flat.
Do not hang the blanket while damp.
If needed, lightly block it by arranging the edges and points evenly while it dries.
Store it clean and completely dry in a breathable bag or cupboard.
Avoid storing it under heavy items, which may flatten the raised puff texture.
To reduce pilling, avoid rough surfaces and excessive friction. Wash bright colors separately the first time if you are concerned about possible color transfer.
Tips for success
Count the six main puff V-stitches. These mark the six sections of the hexagon and help you identify whether the round is progressing correctly.
Use stitch markers at the six puff V-stitches. This makes the growing shape easier to read, especially when the chain spaces become numerous.
Keep your puff stitches consistent. Pull each loop to a similar height so the texture remains even.
Do not work into accidental spaces. The chain-1 spaces and the chain-2 spaces in the puff V-stitches have different purposes.
Check the blanket after each round. The fabric should expand evenly, without puckering or cupping.
Change colors neatly. Complete the final joining slip stitch with the new color when possible for a cleaner transition.
Avoid tight joins. A tight slip stitch can pull the edge inward and make the blanket curl.
Secure the center ring carefully. If the starting ring is loose, the center may leave an unwanted hole.
Weave in ends securely. Run the yarn needle through several nearby stitches in different directions, then trim the excess.
Block only after finishing. Light blocking can help even the hexagon points and settle the shell edging.
Customize your project
Replace the original palette with ocean blues, sandy neutrals, coral, or sunset shades.
Use one color for the blanket body and a contrasting color for the edging.
Repeat your favorite stripe group if you want a different color balance.
Make a smaller version by stopping before Round 29. The finished size will be smaller and will require less yarn.
Add more rounds for a larger blanket, continuing the Round 3 structure and planning additional yarn before beginning.
Use a thicker yarn for a heavier throw, but expect a larger, warmer blanket with different drape and yarn requirements.
Use a finer yarn for a lighter blanket, though the project will become smaller and may need more rounds.
Add a simple embroidered name or motif after completing the blanket, taking care not to flatten the puff stitches.
Create coordinating pieces, such as a smaller lap blanket or cushion cover, by using the same color sequence.
Any change to yarn weight, hook size, or the number of rounds will affect the finished dimensions and may change how much yarn you need.
Crochet FAQ
Is this blanket suitable for beginners?
It is best suited to confident beginners or intermediate crocheters. The rounds repeat a consistent structure, but you should be comfortable with puff stitches, joined rounds, color changes, and reading abbreviations.
What yarn works best for this project?
The specified yarn is RED HEART® Soft Baby Steps® in the listed colors. If substituting, choose a similar yarn weight and use the same type of yarn throughout the blanket so the texture and tension remain consistent.
Can I use a different crochet hook?
Yes, but the hook size affects the fabric. A smaller hook may create a firmer, smaller blanket, while a larger hook may create a looser, larger blanket with more drape. Test a small section first and make sure the puff stitches do not feel cramped.
How much yarn do I need?
The pattern calls for 2 balls of Color A and 1 ball each of Colors B, C, and D. Color A is 9630 Lime D, Color B is 9505 Aqua A, Color C is 9800 Baby Blue C, and Color D is 9530 Jadie B.
How can I make the blanket smaller?
Stop after an earlier round instead of completing all 29 rounds. Finish with the edging once the blanket reaches the size you want. The color balance will change if you stop in the middle of a planned stripe section.
How can I make it larger?
Continue the Round 3 repeat beyond Round 29, keeping the six puff V-stitches and the same expanding structure. Purchase additional yarn first, because a larger blanket may require considerably more yardage.
Why is my blanket curling?
A small amount of movement can happen while the blanket is being worked, but pronounced curling usually results from tight tension, tight joining slip stitches, or missed chain spaces. Check that you are working into every required space and try loosening your tension slightly.
How do I keep the edges even?
Maintain consistent puff-stitch height, count the six puff V-stitches each round, and make sure the chain spaces are not accidentally skipped. Light blocking after the edging can also help the outer points sit evenly.
How should I wash the finished blanket?
Follow the yarn label. Use gentle washing, cool or lukewarm water, mild detergent, and flat drying when permitted. Support the blanket while wet to prevent stretching.
Can I sell blankets made from this pattern?
The source instructions provided here do not state the designer’s policy regarding finished-item sales. Check the original pattern’s usage terms before selling completed blankets, and do not sell or redistribute the written pattern itself without permission.