Easy Baby Blanket Pattern

This post may contain affiliate links. If you buy through them we may earn a small commission at no extra cost to you. Learn more.
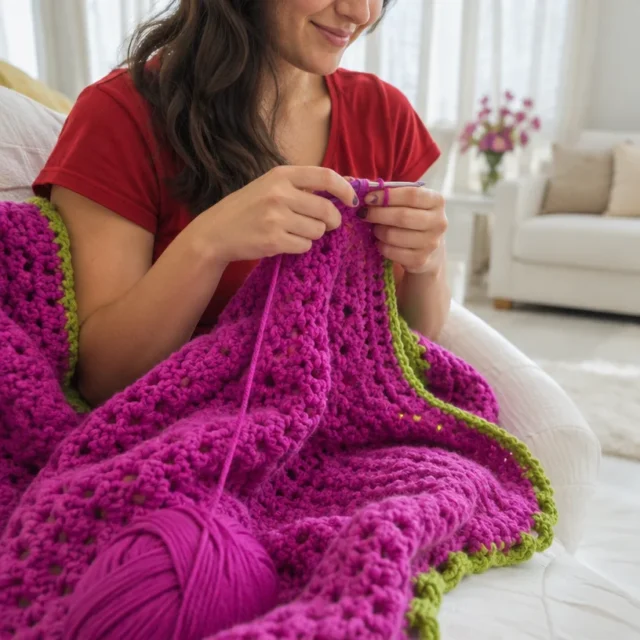
This soft crochet baby blanket combines a clean solid-color background with a cheerful ombré contrast yarn. The repeating shell pattern creates open, decorative rows without making the blanket overly complicated. It is a rewarding project for crocheters who know basic chains, single crochet, double crochet, and slip stitches, and it makes a thoughtful baby-shower gift or cozy nursery accessory.
Thank you for reading this post, don't forget to subscribe!Why you’ll love this pattern
- The repeating eight-row section is easy to recognize once established.
- Alternating the main color and contrast yarn creates a striking layered effect.
- The shell stitches add visual interest while keeping the fabric soft and flexible.
- The pattern is excellent for practicing color changes and working over chain spaces.
- It makes a useful handmade gift for a new baby, nursery, or toddler.
- The blanket grows in a straightforward back-and-forth construction, making it easy to work on while relaxing.
“The color changes make this blanket look much more complicated than it is. Once I understood where to pick up each dropped strand, the rows became very enjoyable to repeat.”
How this crochet pattern comes together
You begin with a foundation chain of 148 stitches and work the first row in the main color. The contrast color is then introduced for shell rows, while the main color creates the connecting rows beneath and between the shells.
The design uses:
- Chain stitches (ch)
- Single crochet (sc)
- Double crochet (dc)
- Slip stitches (sl st)
- Shells made with four double crochets, separated by a chain-2 space
- Color changes using dropped strands
The pattern repeats rows 3 through 8 until the blanket measures approximately 34 inches (86.5 cm) from the beginning. It ends with a decorative fan-style row and a matching border worked across the foundation chain.
This is best suited to an advanced beginner or intermediate crocheter. You should be comfortable identifying turning chains, working into chain spaces, skipping stitches, and carrying or picking up a previously dropped strand. Completion time will depend on your tension, pace, and available crochet time.
Materials you’ll need
- Bernat® Baby Sport Solids, 350 g (12.3 oz), 1148 m (1256 yds)
- Main Color (MC): 21005 Baby White — 1 ball
- Bernat® Baby Sport Ombres, 280 g (9.8 oz), 816 m (893 yds)
- Contrast A: 24702 Punch Fun — 1 ball
- Crochet hook: 4 mm (U.S. G or 6), or the size needed to obtain gauge
You may also find these optional tools useful:
- Yarn needle for securing ends
- Scissors
- Measuring tape
- Stitch markers
- Blocking pins and a suitable blocking surface
Both yarns are designed for lightweight baby projects. If you substitute yarn, choose a similar sport-weight yarn and check your gauge carefully. A different yarn fiber or thickness can change the blanket’s size, drape, warmth, and yarn requirements.
Step-by-step instructions
Abbreviations
- ch: chain
- dc: double crochet
- sc: single crochet
- sl st: slip stitch
- RS: right side
- MC: main color
- rep: repeat
A shell in this pattern is formed by working 2 dc, ch 2, 2 dc in the same stitch unless the instructions specify a larger six-dc fan.
1. Make the foundation and first row
With MC, chain 148.
Row 1 (RS):
- Work 1 dc in the fourth chain from the hook. This counts as 2 dc.
- Work 1 dc in each chain to the end.
- You should have 146 stitches.
- Join Contrast A.
- Do not break MC. Pull up a long loop of MC so it does not unravel.
- Turn.
2. Work the first shell row
Row 2:
- With A, chain 3. This counts as 1 dc.
- Work 1 dc in the first dc.
- Repeat the following across the row:
- Chain 2.
- Skip the next 5 dc.
- Work 2 dc, ch 2, 2 dc all in the next dc. This forms a shell.
- Repeat from the first “ch 2” to the last 6 dc.
- Chain 2 and skip the next 5 dc.
- Work 2 dc in the top of the turning chain-3.
- Do not break A. Pull up a long loop of A to prevent it from unraveling.
- Do not turn.
3. Connect the shell row with MC
Row 3:
- Pick up the dropped MC strand from Row 1.
- With MC, chain 3.
- Slip stitch to the top of the chain-3 from Row 2.
- Chain 1.
- Work 1 sc in the same space as the slip stitch.
- Chain 1 and skip the next dc of the row below.
- Working over the chain-2 spaces, repeat the following:
- Work 1 dc in each of the next 2 dc from the row below.
- Chain 2.
- Work 1 sc in the chain-2 space of the shell.
- Chain 2.
- Skip the next 2 dc from the row below.
- Repeat to the last chain-2 space and 2 dc.
- Working over the final chain-2 space, work 1 dc in each of the next 2 dc from the row below.
- Chain 1 and skip the next dc.
- Work 1 sc in the top of the last dc.
- Turn.
4. Fill the spaces with double crochet
Row 4:
- Chain 3. This counts as 1 dc.
- Work 1 dc in the next chain-1 space.
- Repeat the following across the row:
- 1 dc in each of the next 2 dc.
- 2 dc in the next chain-2 space.
- 1 dc in the next sc.
- 2 dc in the next chain-2 space.
- Repeat to the last 4 stitches.
- Work 1 dc in each of the next 2 dc.
- Work 1 dc in the next chain-1 space.
- Work 1 dc in the last sc.
- Do not turn.
- Do not break MC.
5. Add the next contrast shell row
Row 5:
- Pick up the dropped A strand from Row 2.
- With A, chain 3.
- Slip stitch to the top of the chain-3 at the beginning of Row 4.
- Chain 3. This counts as 1 dc.
- Work 1 dc in the same space.
- Repeat the following:
- Chain 2.
- Skip the next 6 dc.
- Work a shell in the next dc. The shell is 2 dc, ch 2, 2 dc in the same stitch.
- Repeat to the last 6 dc.
- Chain 2 and skip the next 5 dc.
- Work 2 dc in the last dc.
- Do not break A.
- Turn.
6. Work the next connecting row
Row 6:
- Pick up the dropped MC strand from Row 4.
- With MC, chain 3.
- Slip stitch to the top of the first dc of Row 5.
- Chain 1.
- Work 1 sc in the same space as the slip stitch.
- Chain 1 and skip the next dc of the row below.
- Working over the chain-2 spaces, repeat:
- 1 dc in each of the next 2 dc from the row below.
- Chain 2.
- 1 sc in the chain-2 space of the shell.
- Chain 2.
- Skip the next 2 dc from the row below.
- Repeat to the last chain-2 space and 2 dc.
- Working over the final chain-2 space, work 1 dc in each of the next 2 dc from the row below.
- Chain 1 and skip the next dc.
- Work 1 sc in the top of the chain-3.
- Turn.
7. Repeat the solid-color double crochet row
Row 7:
Work the same instructions as Row 4.
Then:
- Turn.
- Do not break MC.
8. Work the next contrast shell row
Row 8:
- Pick up the dropped A strand from Row 5.
- With A, chain 3.
- Slip stitch to the top of the chain-3 at the beginning of Row 4.
- Chain 3. This counts as 1 dc.
- Work 1 dc in the first dc.
- Repeat the following:
- Chain 2.
- Skip the next 6 dc.
- Work a shell in the next dc.
- Repeat to the last 6 dc.
- Chain 2 and skip the next 5 dc.
- Work 2 dc in the top of the turning chain-3.
- Do not break A.
- Do not turn.
9. Repeat the main pattern section
Repeat Rows 3 through 8 until the blanket measures approximately 34 inches (86.5 cm) from the beginning.
End after completing a Row 4.
Measure from the foundation edge to the current edge rather than relying only on the number of repeats. This helps account for individual tension differences.
10. Work the decorative top edge
After ending with Row 4, work the following row on the right side.
- Pick up the dropped A strand from Row 8.
- With A, chain 3.
- Slip stitch to the top of the chain-3 of the last row.
- Chain 3. This counts as 1 dc.
- Work 2 dc in the first dc.
- Repeat the following:
- Skip the next 2 dc.
- Work 1 sc in the next dc.
- Skip the next 3 dc.
- Work 6 dc in the next dc.
- Repeat to the last 6 dc.
- Skip the next 2 dc.
- Work 1 sc in the next dc.
- Skip the next 2 dc.
- Work 3 dc in the last dc.
- Fasten off.
11. Add the border across the foundation chain
- Place the blanket with the right side facing.
- Join A with a slip stitch to the bottom-left corner.
- Work across the foundation chain as follows:
- Chain 3. This counts as 1 dc.
- Work 2 dc in the same space as the joining slip stitch.
- Repeat: skip the next 2 chains, work 1 sc in the next chain, skip the next 2 chains, and work 6 dc in the next chain.
- Repeat to the last 6 chains.
- Skip the next 2 chains.
- Work 1 sc in the next chain.
- Skip the next 2 chains.
- Work 3 dc in the last chain.
- Fasten off.
Weave in all loose ends securely on the wrong side. Because the blanket uses several dropped strands, check that every color change is secure before trimming the ends.
Ways to use your finished project
- Give it as a baby-shower or new-baby gift.
- Use it as a lightweight nursery blanket.
- Fold it over the back of a rocking chair or nursing chair.
- Place it at the foot of a crib or toddler bed for decorative layering.
- Coordinate it with handmade burp cloths, hats, or small nursery accessories.
- Photograph it with a baby milestone setup, keeping the blanket supervised and away from a sleeping infant.
- Offer it as a handmade gift or craft-fair item, subject to the original pattern designer’s usage terms.
For babies, always follow safe-sleep guidance. Do not leave a loose blanket with an unattended sleeping infant.
How to care for your crochet project
Follow the care instructions on the Bernat yarn labels first. For a baby blanket, gentle handling is especially important.
- Wash using the label-recommended method and water temperature.
- Choose a mild detergent.
- Avoid bleach unless the yarn label specifically permits it.
- Wash separately the first time if you are concerned about color transfer from the ombré yarn.
- Do not wring or twist the blanket, as this can stretch the shell rows.
- Gently press out excess water and reshape the blanket while damp.
- Dry flat on a clean surface.
- Avoid hanging the wet blanket, which may cause stretching.
- If needed, use light blocking to straighten the edges and open the shell pattern.
- Store the blanket completely dry in a breathable container or drawer.
- Keep it away from rough surfaces that may encourage pilling.
Tips for success
- Make a gauge swatch before starting if the finished size matters. Adjust the hook size if your fabric is too tight or too loose.
- Count the foundation chain carefully. The starting chain establishes the spacing for the entire blanket.
- Remember that the chain-3 turning chain counts as a double crochet whenever the pattern says it does.
- Use stitch markers to identify the first and last stitch of long rows.
- Keep dropped color strands in separate positions so you can easily identify MC and A.
- Pull only a long enough loop to prevent the unused strand from unraveling. Very large loops can become tangled.
- Work over the chain-2 spaces as instructed. Do not accidentally work into the individual chains unless the pattern specifically tells you to.
- Check that every shell has the correct structure: 2 dc, ch 2, 2 dc.
- The six-dc fans in the final row are different from the regular shells. Read that row slowly.
- Measure the blanket after completing a full section, preferably after Row 4.
- Keep your edges flat. If an edge begins to ripple, check for accidental extra stitches or missed skips.
- Weave in color-change ends securely in more than one direction before washing.
Creative variations
Change the color palette
Keep MC in a soft neutral and replace Contrast A with another ombré shade for a different nursery style. Pastels create a gentle look, while brighter colors make the shells more prominent.
Use two solid colors
A solid contrast yarn can replace the ombré yarn if it is a similar sport weight. The stitch pattern will remain the same, but the finished blanket will have clearer, more defined color bands.
Adjust the length
Repeat or omit complete 3rd-to-8th-row sections to change the blanket’s length. Always finish with Row 4 before working the decorative top edge. Adding sections increases yarn usage.
Adjust the width carefully
The foundation chain controls the width and should be changed only with care. Since the pattern relies on a repeating shell arrangement, altering the chain count may disrupt the stitch pattern. Work a small sample or calculate the repeat before changing the starting chain.
Coordinate the border
Use a contrasting solid color for the final edge if you want the border to stand out. A border color change may require additional yarn and can alter the visual balance of the blanket.
Add simple embroidery
After finishing, you can add a small initial or simple motif with yarn. Keep embellishments securely attached and avoid loose pieces on blankets intended for babies.
Frequently asked questions
Is this baby blanket pattern beginner-friendly?
It is suitable for an advanced beginner who knows basic crochet stitches. The main challenge is managing the dropped color strands and working across chain spaces. Beginners should practice the shell section with scrap yarn before starting the full blanket.
What yarn works best for this crochet blanket?
The pattern uses Bernat® Baby Sport Solids and Bernat® Baby Sport Ombres. A similar sport-weight yarn can work, but changing the yarn’s weight or fiber may affect the finished dimensions, drape, warmth, and yarn amount.
Can I use a different crochet hook?
Yes, but use the hook size that gives you the correct gauge. A smaller hook usually creates a firmer, smaller fabric, while a larger hook generally creates a looser, larger fabric with more drape.
How much yarn do I need?
The listed materials are one ball of Bernat® Baby Sport Solids in MC and one ball of Bernat® Baby Sport Ombres in Contrast A. You may need more if you change the blanket’s width or length, use a different tension, or add extra edging.
How can I make the blanket longer?
Repeat additional complete sections of Rows 3 through 8. End with Row 4 before working the decorative top edge. Keep in mind that extra sections require additional yarn.
How can I make it wider?
The foundation chain determines the width, but the shell pattern has a repeating structure. Changing the starting chain without preserving the required repeat can cause the edges and final border to misalign.
Why is my blanket curling?
A small amount of curling can come from tension, skipped stitches, or the natural structure of the shell rows. Check your stitch count and make sure you are working the stated stitches into the correct spaces. Gentle blocking can help flatten the finished blanket.
How do I keep the edges even?
Count the first and last stitches, especially around the turning chains. Remember that the chain-3 counts as a dc where indicated. Stitch markers can help identify the row ends and prevent accidental increases.
Should I wash the blanket before gifting it?
Check the yarn-label instructions. If washing is permitted, a gentle wash and complete flat drying can remove handling residue and show you how the fabric behaves. Make sure the blanket is fully dry before wrapping or storing it.
Can I sell blankets made from this pattern?
The source instructions provided here do not state the designer’s selling or licensing policy. Check the original pattern designer’s usage terms before selling finished blankets or using the pattern for commercial production.